Spicy Tuna Bowl

 
Spicy-Tuna-Bowl_v2_01.jpg

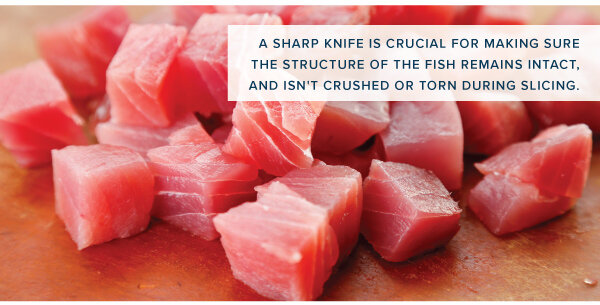
We love food that tastes good and looks good too! Poke (pronounced poh-KAY) means 'to cut crosswise into pieces' — so sharpen your knives! Poke is a common Hawaiian dish, brought to the islands by early Polynesian settlers. This recipe highlights the fresh flavors of jewel-like raw ahi tuna. Also known as yellowfin tuna, the freshness and quality of the fish are key to this dish, so make sure to find high-quality, sushi-grade tuna, and plan to prepare the poke bowls the same day you purchase the fish for maximum flavor!

Spicy Tuna Poke Bowl
Makes 2 bowls

Tuna Marinade Ingredients:
1 teaspoon minced shallot
2 tablespoons soy sauce
1 teaspoon mirin
1/4 teaspoon cayenne
1 teaspoon crushed seaweed (nori)
1 teaspoon sesame oil
1/2 pound sushi grade ahi tuna, cut into 1/2" cubes

Sushi Rice Ingredients:
1 cup white sushi rice
1 cup water
1 tablespoon rice vinegar
1 teaspoon white sugar
1 teaspoon salt

Spicy Mayo Ingredients:
3 tablespoons full fat mayo
2 tablespoons sriracha
1 teaspoon freshly squeezed lemon juice

Bowl Ingredients:
1/2 English cucumber, peeled and diced into 1/2" cubes
1 avocado, sliced
3 green onions, cut on the bias
1 teaspoon black sesame seeds
1 teaspoon sesame seeds
Seaweed (nori), cut into strips
Pickled ginger (optional)

Directions:
1. Combine all of the marinade ingredients except for the tuna in a large bowl. Whisk to incorporate. Add the cubed tuna to the marinade and gently toss the fish in the marinade to coat. Cover and refrigerate for 60 minutes.

2. Meanwhile, prepare the rice. Rinse the rice in a colander until the milky water runs clear. Combine rice and water in a medium saucepan, cover, and bring to a boil. Once boiling, reduce the heat to low and cook for an additional 15 minutes, until the rice is soft and fluy and the water has been absorbed. Remove from heat and cool until the rice is warm, but not hot.

3. While the rice is cooling, combine the vinegar, sugar, and salt in a small saucepan and bring to a simmer until the salt and sugar have dissolved, about 2 minutes. Remove from heat and carefully stir the vinegar into the rice.

4. Combine the spicy mayo ingredients in a bowl, and whisk to incorporate.

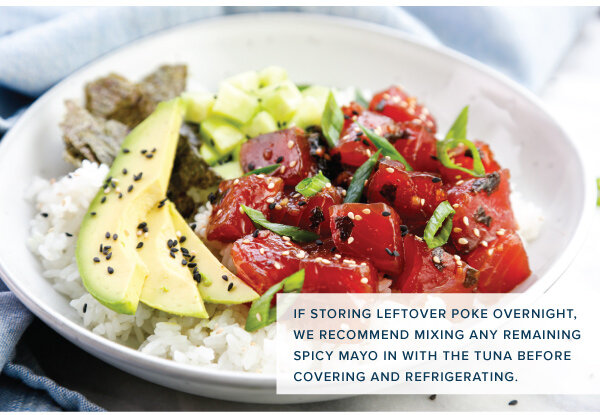
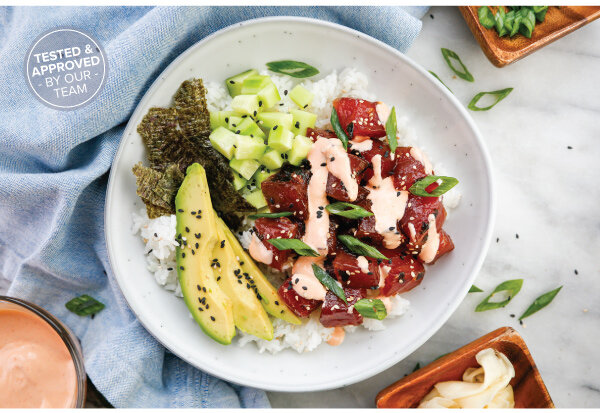
5. Assemble the poke bowls by layering the rice on the bottom of a shallow bowl, then adding a portion of marinated tuna next to the cucumber, avocado, green onion, and nori. Drizzle with the spicy mayo, sprinkle with the sesame seeds, and serve with pickled ginger if desired.


Grilled Chicken Sandwiches

 
ChixSandwiches_v2_01.jpg

Enjoy a fully loaded grilled chicken sandwich! Perfectly grilled, juicy chicken is layered with elements of sweet, salty, tangy, and savory that will delight the senses. You won't believe how easily it comes together!

Grilled Chicken Sandwiches
Serves 4

Chicken and the Rub:
2 boneless chicken breasts, sliced in half
2 tablespoons olive oil
1/2 teaspoon Kosher salt
1/2 teaspoon fresh ground pepper
1/2 teaspoon ground cumin
1/4 teaspoon garlic powder
1/4 teaspoon paprika
1 teaspoon sugar

Sandwich Ingredients:
4 buns
4 tablespoons butter for buns
4 slices pepper jack cheese
1 avocado, sliced
1 ripe mango, sliced
4 ounces spinach
1/4 red onion, thinly sliced
BBQ sauce

Directions:
1. In a large bowl drizzle the chicken with the olive oil, and then rub with the spices (Kosher salt, pepper, cumin, garlic powder, paprika, and sugar) until well-coated on all sides. Preheat the grill.

2. Butter the buns on the inside of both the top and bottom, and prepare to grill by placing on a plate or platter to take out to the grill. Place the cheese on the side of the same plate, too.

3. Prepare the toppings for the sandwich. Halve, de-seed, peel, and slice the mango. Halve, pit, peel, and slice the avocado. Wash and spin dry the spinach leaves; remove stems as needed. Thinly slice the red onion.

4. Grill the chicken breast for 4-5 minutes and flip with grill tongs or metal spatula. Once the chicken breasts are almost done, place the cheese on top of each chicken breast, and allow the cheese to melt. Remove from the grill once the thickest part of the breast reaches 165 degrees F. Let the grilled breasts rest on a clean platter while grilling the buns.

5. Toast the buns on the grill until just golden brown.

6. Layer the toasted bun with a smear of BBQ Sauce, then add a layer of spinach leaves. Place the grilled chicken breast with melted cheese on top of the spinach. Add slices of avocado and mango, and top with slices of red onion. Drizzle more BBQ sauce on top. Finish the sandwich by capping it all with the top grilled bun. Enjoy!


Spring Roll Bowls

 
Spring_Roll_Bowls_V2_01.jpg

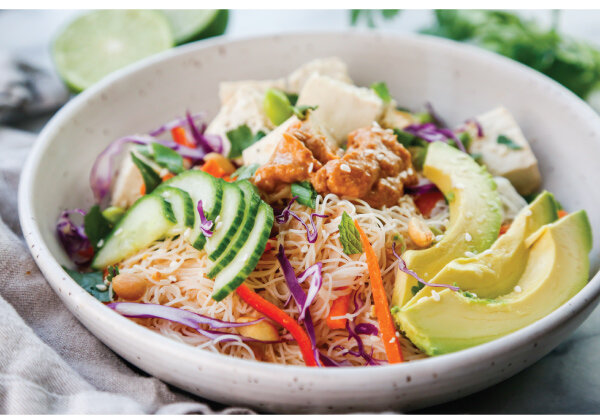
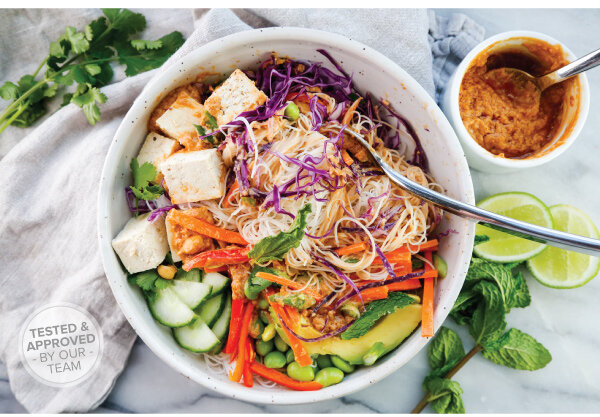
Craving fresh and flavorful? Crunchy, salty, sweet, colorful, and delicious -- our Spring Roll Bowls can satisfy them all! Great for lunch or dinner, this veggie-packed bowl delivers a healthy punch of flavor and goodness in an easy to assemble bowl. A rainbow of ingredients pair with marinated tofu and vermicelli noodles. It’s all topped with a bold and spicy peanut sauce that will tickle your taste buds!

Spring Roll Bowl with Spicy Peanut Sauce
Makes 4 servings

Tofu and Marinade Ingredients:
14 oz block firm or extra firm tofu
2 teaspoons soy sauce
1-1/2 tablespoons rice vinegar
2 teaspoons sesame oil
1/4 teaspoon black pepper
1/2 tablespoon sesame seeds

Bowl Filling Ingredients:
2 large carrots, or 4 small carrots peeled
1 red pepper
1 English cucumber
4 green onions, sliced
1 avocado, sliced
1/4 head red cabbage, sliced with a mandoline
1 cup edamame
8.8 oz vermicelli noodles (1 standard package)

Spicy Peanut Sauce Ingredients:
1 cup peanut butter
2 tablespoons chili garlic sauce
2 tablespoons soy sauce
2 tablespoons rice wine vinegar
2 teaspoons sesame oil
3 tablespoons fresh lime juice
2 cloves garlic, minced
2 teaspoons ginger, grated
1 tablespoon brown sugar
2 tablespoons water, for thinning

Garnishes:
1/4 cup mint leaves
1/2 cup unsalted peanuts
Fresh cilantro leaves
Lime wedges

Directions:
1. Prepare the tofu. Drain the tofu and cut it in half down the length of the tofu block. Press the tofu between two paper towel-lined plates and use a large book or a heavy cutting board to gently press out any excess moisture. Let the tofu continue to press while preparing the other ingredients.

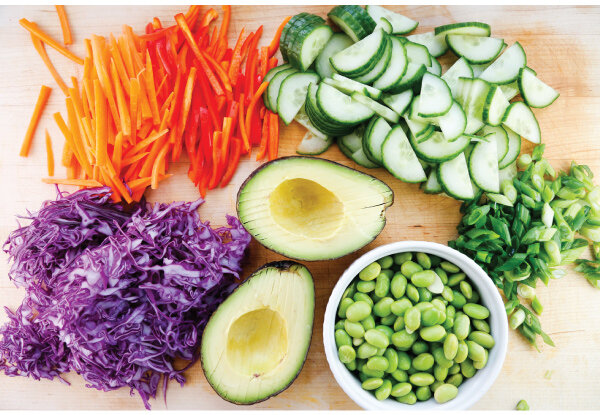
2. Prep the veggies. Cut the carrots and red pepper into matchsticks. Slice the cucumber, green onion, and avocado. Use a mandoline to finely shred the cabbage. Measure out the edamame.

3. Make the peanut sauce. Combine all of the peanut sauce ingredients together, except for the water, in a small bowl or measuring glass, and whisk to incorporate. Slowly whisk in the water one teaspoon at a time to thin the sauce until it is just able to be poured.

4. Place the vermicelli noodles in a bowl with very hot water, stir to separate. Cover for 15 minutes until noodles are softened and tender. Drain the noodles and run them under cool water. Set aside.

5. Cut the pressed tofu into 1/2" cubes. In a medium bowl whisk all of the the tofu marinade ingredients together, except for the sesame seeds, and then combine with the tofu. Gently and slowly toss the tofu in the marinade until the tofu is coated. Set aside for 10 minutes to let flavors incorporate into the tofu. Then sprinkle the tofu with the sesame seeds.

6. Assemble the bowls. Divide the cooked vermicelli noodles equally into four bowls. Top the noodles with the bowl filling ingredients and the tofu, sectioning the ingredients if desired. Drizzle with the peanut sauce and garnish with mint, peanuts, cilantro, and lime wedges.


Baked Salmon with Asparagus

 
Salmon_v2_01.jpg

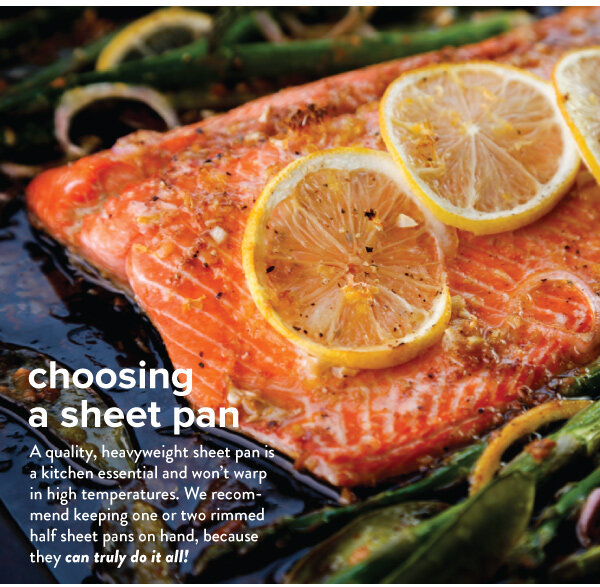
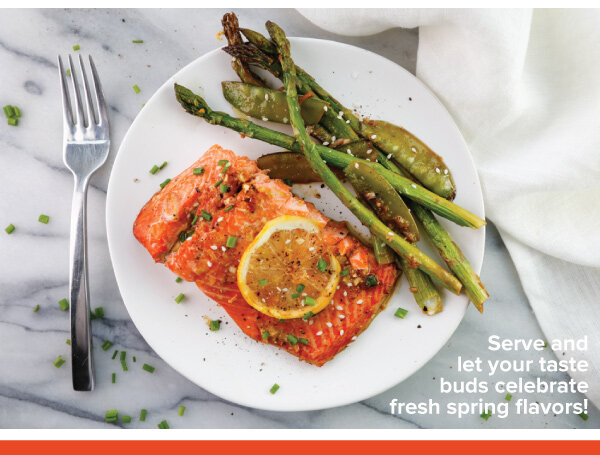
Flaky salmon, spring asparagus, and bright lemon flavors come together in this beautiful sheet pan dinner for the whole family. This menu features minimal prep time, and renders tasty, heart-healthy rewards. Great for fast weeknight dinners, make this no-hassle, one-pan meal tonight!

Baked Salmon with Lemon & Asparagus
Serves 4

Ingredients:
1.5 lb. skin-on salmon fillet
1 large bunch of asparagus (roughly 20 spears)
2 cups snow peas, trimmed
1 shallot, finely sliced
1 small lemon, sliced into rounds

Garnishes:
Chives, chopped Sesame seeds

Garlic Ginger Sauce:
6 cloves garlic, minced
1 lemon, zested and juiced (about 1 1/2 tablespoons lemon juice)
1/4 cup soy sauce
1-inch fresh ginger root, finely grated
3/4 tablespoon Worcestershire sauce
4 tablespoons olive oil
1/2 teaspoon Kosher salt
1/4 teaspoon black pepper

Directions:
1. Preheat the oven to 425° F.

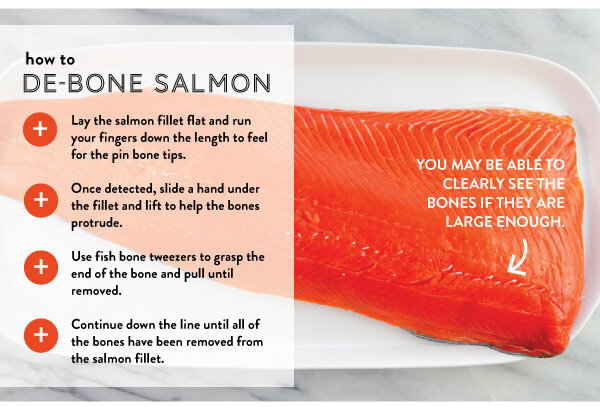
2. Prep the ingredients. Debone the salmon with fish tweezers. Trim off the woody bases of the asparagus stalks. Trim the snow peas and finely slice the shallot. Slice one lemon into thin rounds.

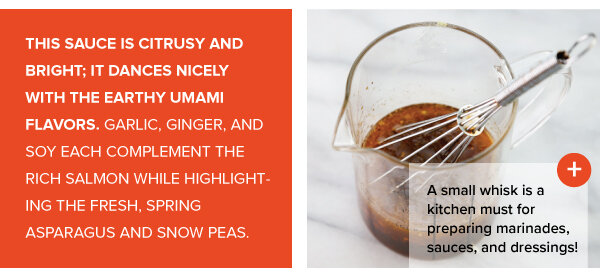
3. Whisk the sauce ingredients together in a small bowl or glass measuring cup.

4. Lightly grease a large sheet pan. Place the salmon fillet in the middle of the sheet pan, then arrange the asparagus, snow peas, and shallot around the fish. Place the lemon slices on top of the salmon.

5. Drizzle everything with the garlic ginger sauce, turning the asparagus and the snap peas with tongs so they are fully coated.

6. Bake in the hot oven for 15-18 minutes, or until the salmon is flaky and the asparagus and snow peas are crisp tender. Remove from the oven and sprinkle everything with the chives and sesame seeds. Add additional salt and pepper to taste. Serve immediately.


Pea Pesto Pasta

 
Pea_Pesto_v2_01a.jpg

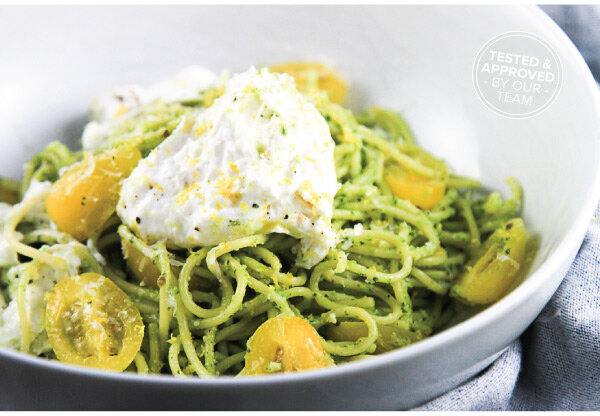
A good pasta dish can transform everyday ingredients into something extraordinary any day of the week. Springtime flavors inspire this fresh take on pasta. We think your family will love this super-quick, spring pea pesto pasta dish. Buon appetito!

Spring Pea Pesto Pasta
Serves 4

Spring Pea Pesto Ingredients:
1/2 cup frozen peas
1/4 cup Parmesan cheese
1/2 teaspoon Kosher salt
1/4 teaspoon freshly ground black pepper
1/4 teaspoon crushed red pepper flakes
1/2 cup olive oil
1/2 cup packed fresh basil leaves
1 tablespoon packed fresh mint leaves
juice of 1/2 lemon (about 2 tablespoons)
1 small clove fresh garlic

Pasta:
1 lb thin spaghetti

Garnish:
1 pint Sun Gold tomatoes, halved
8 oz burrata cheese
Mint leaves, chiffonade
Basil leaves, chiffonade
Lemon zest

Directions:
1. Gather all of the pesto ingredients together. Be sure to thoroughly wash all of the fresh herbs! Pulse the pesto ingredients together in a food processor. Taste test the pesto, and adjust the salt and pepper accordingly. If needed, add more olive oil for a thinner consistency. Enjoy pesto immediately, or keep covered and refrigerated (or even frozen) until ready to use.

2. Slice the tomatoes in half with a small paring knife. Roll the basil and mint leaves and cut in a chiffonade cut for a garnish.

3. Cook the pasta according to the package instructions. Drain, reserve about 1 cup of the pasta cooking water. For better pasta, salt the water! The cooking water should be “like the sea” – start with about 1 teaspoon coarse kosher salt per quart of water. This seems like a lot of salt, and it is, but most of this will be discarded when the pasta is drained. Test the pasta frequently as it approaches completion. Pasta should be cooked to al dente – “to the tooth” – tender, yet chewy, not at all mushy. The easiest way to check for doneness, is to remove a piece of pasta and test between your teeth. Or, cut a piece of test pasta, and check the cross section view. The smallest white dot, or white line at the center of the pasta piece indicates doneness is nearly at hand.

4. Mix the pesto with the drained and cooked pasta, stir with tongs until the pasta is well-coated with the pesto. Add reserved pasta water, to thin the sauce, if needed. 5. Garnish the pasta with the tomato halves, pieces of fresh burrata, mint, and basil leaves. Enjoy!


Crustless Quiche

 
Crustless-Quiche_v3_01d.jpg

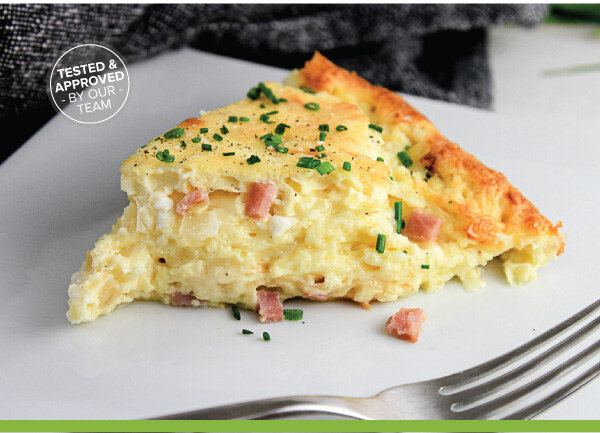
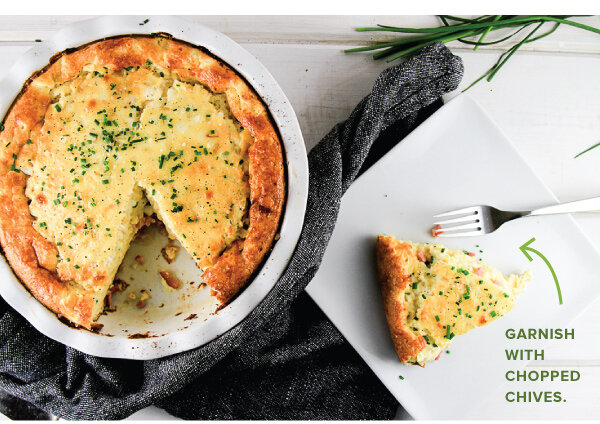
This savory, crustless quiche is an elegant, yet easy, recipe! The eggs have a light and airy quality that are well-balanced with hearty bits of ham and Swiss cheese. This delicious recipe pairs easily with a salad anchoring a meal that’s satisfying enough to be called either brunch or dinner!

Savory, Crustless Quiche - Ham & Cheese
Makes one 9-inch pie

Ingredients:
1/2 large sweet onion, diced and sautéed
2 tablespoons butter
5 eggs
1/2 cup heavy cream
1/4 cup flour
1/2 teaspoon baking powder
1/4 teaspoon Kosher salt
1/4 teaspoon black pepper
1 cup sour cream
1 cup cottage cheese
1 cup ham, finely diced
1/4 cup Parmesan cheese, grated
1-2 cups Swiss cheese, grated
Fresh chives for garnishing

Directions:
1. Prepare a 9-inch pie dish by buttering all of the surfaces, or spraying with a cooking spray.

2. Preheat the oven to 350°F

3. In a skillet, saute the onion in 1 tablespoon of butter until softened. Remove from the heat and let the onions cool slightly.

4. In a large bowl, whisk the eggs until combined. Add the cream and whisk some more until combined. Add the flour, baking powder, Kosher salt, and back pepper; continue whisking. Fold in the sour cream and cottage cheese. Stir in the cooled, cooked onions.

5. Layer the diced ham in the quiche pan. Sprinkle the ham with the Parmesan and Swiss cheeses. 6. Pour the egg mixture over the ham and cheese.

7. Bake for 40-45 minutes or until the egg is set in the middle, or reaches a temperature of 165°F in the center. Let cool slightly, then slice and serve.


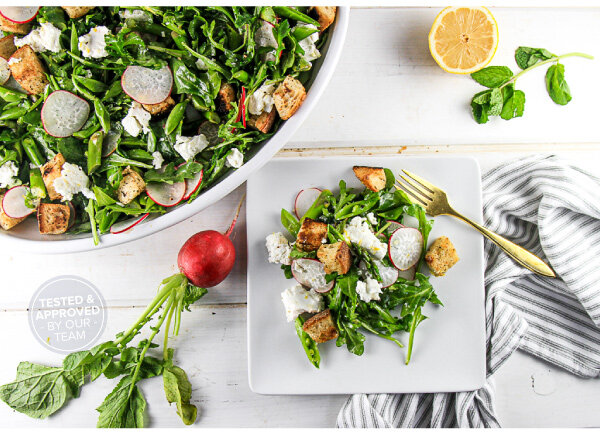
Spring Panzanella

 
Spring-Panz_V3_01.jpg

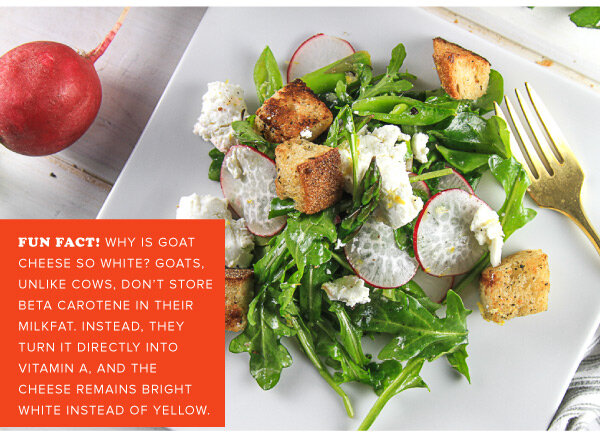
Is it spring yet? Bring it on with our snappy and colorful Spring Panzanella Salad! You’ll find it a satisfying dinner, or a delightful side salad. This healthy salad is packed with spring veggies like roasted asparagus, crunchy snap peas, and super-thin, sliced radishes. Further, this salad experience is elevated with homemade seasoned croutons, creamy goat cheese, a fresh tangy dressing, and tasty garnishes.

Spring Panzanella
Makes 2 large entrée salads, or 4 side salads

Crouton Ingredients:
2-3 cups cubed of rustic loaf of bread, cut into 1-1/2” cubes
2 tablespoons butter
2 tablespoons olive oil
1 teaspoon dried Herbes de Provence seasoning
1/4 teaspoon Kosher salt
1/4 teaspoon pepper

Salad Ingredients:
3-4 cups baby arugula
1 cup snap peas, sliced on the big angle
1/2 bunch asparagus, sliced into 1 inch pieces (tossed with olive oil, Kosher salt, pepper) 4 oz goat cheese, bite sized pieces
4 radishes, thinly sliced with mandoline

Vinaigrette Ingredients:
1/4 cup olive oil
1 tablespoon white wine vinegar
2 tablespoons fresh lemon juice (zest, and then juice)
1 teaspoon Dijon mustard
1/2 teaspoon Kosher salt
1/4 teaspoon fresh ground pepper
1 teaspoon Herbes de Provence
1 teaspoon shallot, minced
1 teaspoon honey

Garnish Ingredients:
lemon zest of 1 lemon
10 mint leaves, cut into a chiffonade

Directions:
1. Preheat the oven to 425 degrees F. Slice the asparagus into 1” pieces. Toss with one tablespoon of olive oil and salt and pepper. Roast the asparagus in a single layer on a baking sheet for 5 minutes, or until just crisp tender.

2. Prepare the cubed bread into semi-soft croutons. Melt the butter in a large skillet and mix with the olive oil. Toss the cubed bread in the skillet until evenly coated. Sprinkle with the Herbs de Provence, kosher salt, and pepper. Stir the croutons while heating until they are lightly toasted on all sides.

3. Meanwhile, prepare the snap peas by washing and cutting on a dramatic angle to reveal the peas inside.

4. Prepare the radishes by washing and cutting thin slices with a mandoline. Take care! Mandolines are super sharp, amazing tools that should be respected. We recommend to gear up for safety and use a protective glove AND the hand guard. The thin slices are so worth it!

5. In a small bowl or jar, whisk together all of the vinaigrette ingredients until emulsified.

6. Mix the salad together in a large bowl. Toss the arugula, sliced radishes, and asparagus with the dressing until coated.

7. Carefully layer in the snap peas and croutons. Top with bite-sized pieces of goat cheese and garnish with lemon zest and fresh mint.


Banana Cream Pie

 
BananaCreamPie_v2_01.jpg

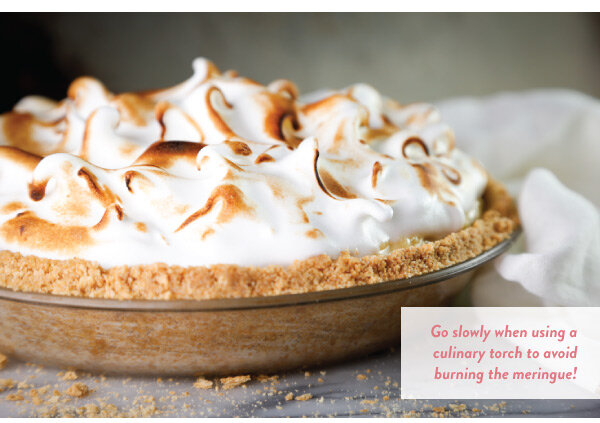
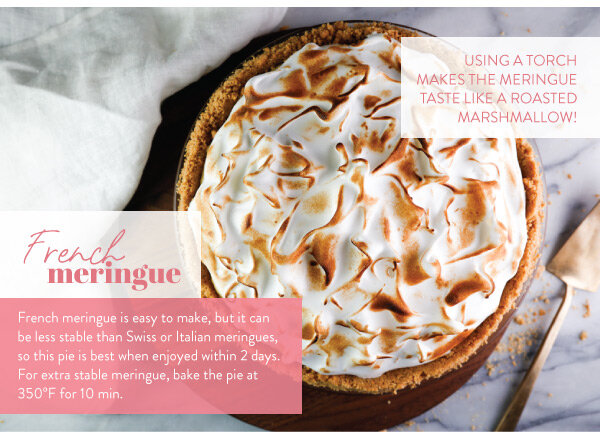
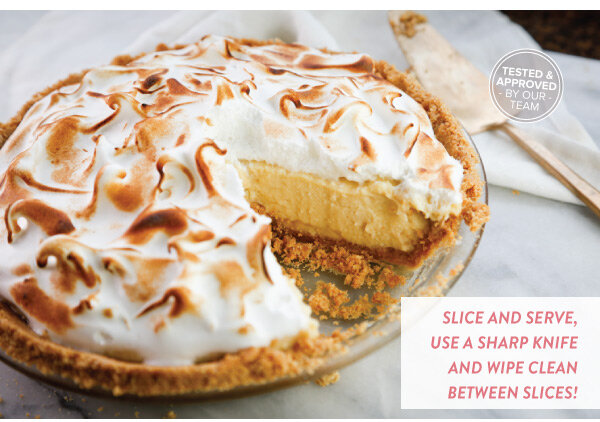
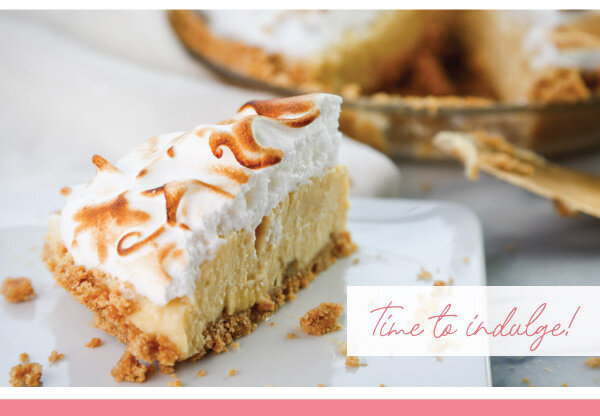
Banana Cream Pie is a favorite across many generations for a good reason! The memorable flavors of sweet banana and creamy vanilla custard are wonderfully compatible and so delicious. This recipe introduces a playful peanut butter graham cracker crust that can’t be beat. But, the real show stopper is the impressive meringue topping, caramelized by the kitchen’s most thrilling tool — the culinary torch!

Banana Cream Pie
Makes One 9” Pie

Peanut Butter Graham Cracker Crust:
4 tablespoons butter, plus 1 tablespoon butter for greasing the pie pan
1-1/2 cups graham cracker crumbs (roughly 14 whole graham cracker sheets)
1/4 cup white sugar
1/4 teaspoon salt
1/4 cup creamy peanut butter

Meringue:
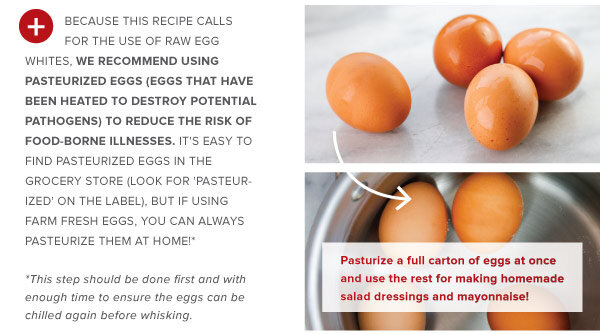
3 large pasteurized egg whites, room temperature
1/4 teaspoon cream of tartar
1/3 cup superfine caster sugar

Custard Filling:
2 cups whole milk
1 cup heavy cream
3 large eggs
3 large yolks (reserve the whites for the meringue)
1/2 cup sugar
1/4 cup brown sugar
1/4 teaspoon Kosher salt
4 tablespoons cornstarch
1/2 tablespoon pure vanilla extract
6 tablespoons unsalted butter, cut into 1/2" cubes
2 large bananas, sliced

Prepare the crust:
Generously butter a 9" pie pan. In a food processor, pulse the graham crackers into fine crumbs. In a medium sized bowl, combine the graham cracker crumbs, sugar, and salt. Melt 4 tablespoons butter in the microwave and in a small bowl, stir together with the peanut butter until combined. Slowly add the butter and peanut butter to the graham cracker mix, using your hands to combine until the crust beings to stick together. Press the mixture evenly to the bottom and up the sides of the buttered pie pan. Chill the pie crust for about 2 hours.

Make the custard and banana filling:
In a medium sauce pan, heat the milk over medium until milk is just scalding. (You will know it is scalding when the milk reaches 180°F and it begins to steam and bubbles start to form.) In a large bowl, whisk together the cream, eggs, egg yolks, sugar, brown sugar, salt, and cornstarch until smooth. Stream in 1/2-cup of the hot milk stirring continuously. Gradually add the remaining hot milk continuing to stir. Pour the mixture back into the saucepan used to heat the milk. Cook over medium heat, stirring continually, until the mixture comes to a soft boil, stirring all the while. Remove from heat. While hot, add the vanilla extract and the cubes of butter. Stir until the butter is melted and combined into the mixture. Set the mixture aside to cool to room temperature. Place a piece of plastic wrap on the surface of the pastry cream to prevent the formation of a “skin.” Refrigerate for one hour or until cooled. Arrange the banana slices in a single layer on the chilled graham cracker crust. Pour the custard filling on top of the bananas. Cover with plastic wrap and chill in the refrigerator for 4 hours.

Make the meringue:
In a stand mixer set to low speed, beat the egg whites until they are frothy. Add the cream of tartar and increase the mixer speed to medium. Continue beating the egg whites until large bubbles form around the edges and the whites begin to get fluy. Gradually add the sugar one teaspoon at a time until fully incorporated. Continue beating on medium-high speed until stiff peaks form. Spoon the egg whites over the top of the custard, evenly spreading and covering the pie all the way to the edge of the crust. Use the back of a spoon to lift up the egg whites to create varying peaks. Use a culinary torch to toast and gently caramelize the meringue. Serve and enjoy!


Classic Potato and Leek Gratin

 
Potato-Leek-Gratin_V3_01.jpg

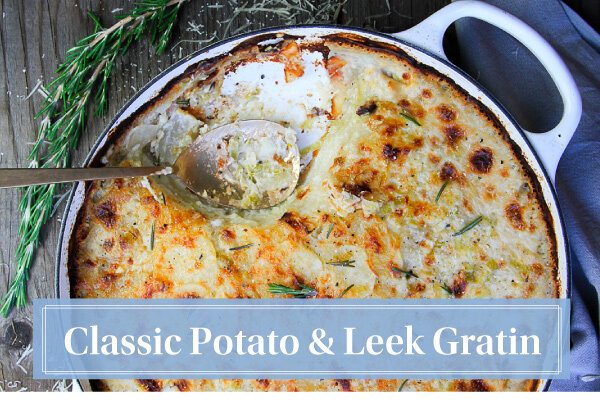
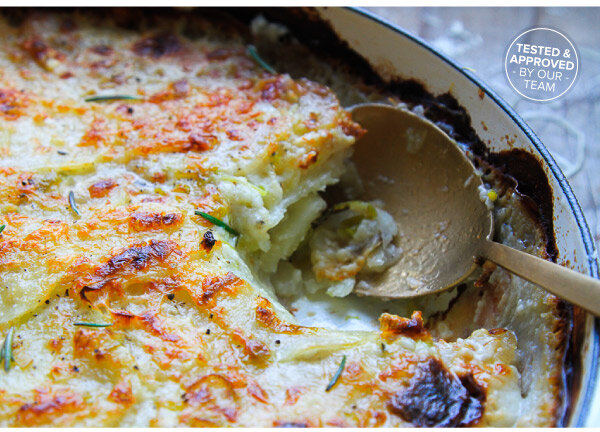
In this classic dish, thinly sliced potatoes are layered with a distinctive Mornay sauce. Mornay sauce is a Béchamel sauce with the addition of Gruyère cheese. The additions of savory leeks, garlic, and rosemary combine in a wonderful way in the sauce to infuse flavor into every bite. This recipe is a warm, comforting side dish, or hearty enough for the main event!

Classic Potato & Leek Gratin
Serves 6 - 8

Ingredients:
2 lbs Idaho potatoes (about 7-8 potatoes), washed, peeled, and thinly sliced with a mandoline
5 tablespoons butter, divided
3 small leeks, green parts removed, finely sliced
1 tablespoon rosemary, minced
4 cloves garlic, minced
1/4 cup all-purpose flour
3 cups whole milk
2 teaspoons kosher salt
1/4 teaspoon black pepper
1-1/2 cup grated Gruyère, plus
2 tablespoons reserved as topping

Directions:
1. Preheat the oven to 400°F.

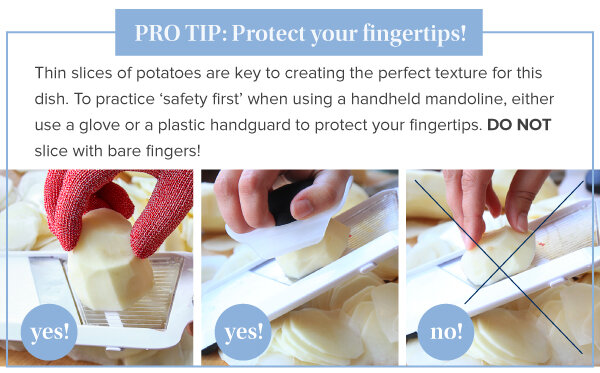
2. Prep the potatoes. Use a sharp peeler to peel the potatoes. Rinse off, and then slice into 1/8” slices using a handheld mandoline.

3. In a large saucepan, melt 1 tablespoon butter and cook the leeks over medium heat until they are translucent, about 10 minutes. Add the rosemary and garlic and cook for about another 3 minutes.

4. Prepare the roux. In a separate, small saucepan, heat the remaining 4 tablespoons of butter. Once the butter has melted, whisk in the flour until the mixture is completely smooth. Continue cooking for about 1-2 minutes. This process removes the raw flour flavor and helps create a silky sauce.

5. Create a Béchamel sauce by very slowly pouring milk into the roux, continue whisking the mixture until the sauce is smooth. Add in the salt and pepper and continue whisking over medium-low heat for 3-5 minutes until the sauce thickens and becomes very creamy.

6. Transform the sauce into a Mornay sauce by slowly adding in the Gruyère cheese. Continue cooking and whisking for a few more minutes until the sauce is smooth, and the cheese is well incorporated. Add the cooked leeks mixture to the sauce.

7. Layer the gratin. Butter the bottom and sides of a large baking dish and lay a single layer of potatoes. Pour some of the sauce over the potatoes and continue to layer the potatoes, pouring more sauce at each layer. Repeat this step until all of the potatoes are used (or you get to within 1/2” from the top of your dish).

8. Coat the final layer of potatoes with sauce and sprinkle with the reserved cheese.

9. Cover the gratin with a tight fitting lid or foil and bake for 60 minutes. Remove the lid or foil, and continue to bake for another 10 minutes, or until the top turns golden brown.

10. Garnish with additional fresh pieces of rosemary, and serve hot.


French Onion Chicken Skillet Dinner

 
French_Onion_Chicken_V2_01.jpg

This chicken dish features a rich pan sauce, loads of slowly caramelized onions, and bubbly, broiled cheeses on top - oh my! Even better, this savory dish is prepared in one large skillet. This French Onion Chicken Skillet Dinner is likely to become a new family favorite.

French Onion Chicken Skillet Dinner
Serves 4 - 6

Ingredients:
4 tablespoons butter
2 large sweet onions, cut pole-to- pole, Lyonnaise style strips
1 teaspoon sugar
2 cloves garlic
6 thin cut skinless, boneless chicken breasts
For dusting chicken: 1/4 cup flour, 1/2 teaspoon Kosher salt, 1/4 teaspoon pepper, 1 teaspoon fresh thyme leaves, 1/4 teaspoon paprika
2 tablespoons flour, for thickening the sauce
1/4 cup white wine
1 cup beef broth
6 sprigs fresh thyme
Kosher salt
Freshly ground pepper
1 teaspoon Worcestershire sauce
8 oz Gruyère or Swiss cheese, shredded
4 oz Parmesan cheese, shredded

Directions:
1. Using a large oven-proof skillet or braiser melt the butter.

2. Add the sliced onions and cook over medium-high heat. Stir the onions every few minutes, then turn down the heat. Continue to cook the onions until they begin to turn a nice brown color. Turn the heat lower, as needed, to prevent the onions from burning. Caramelizing onions fully takes time! A true caramelized onion takes about an hour, but for this recipe giving the onions 25-30 minutes to reach a tender, caramelized state works well. Sprinkle the onions with 1 teaspoon of sugar to help with the process. To help the onions caramelize slowly, let them sit in a little pile, then stir once or twice about every 5 minutes.

3. Once the onions have caramelized, add the garlic and sauté for another 2 minutes until fragrant.

4. Remove the onions from the pan, and set aside to brown the chicken.

5. Lightly coat the chicken breasts in the flour, salt, pepper, paprika, and thyme mixture until dusted on both sides. Add up to 4 additional tablespoons of butter or olive oil while cooking the chicken to prevent sticking.

6. Brown the chicken on both sides and cook until about 150 degrees F, but not all the way done. Remove the chicken from the pan.

7. Add the onions back to the pan, and then sprinkle with 2 tablespoons of flour. Stir until coated. Add the wine, and reduce down. Add the beef broth and Worcestershire sauce, and stir until a sauce is formed. Once the sauce has thickened slightly, add the chicken breasts back in.

8. Turn the oven to broil. Sprinkle the chicken breasts with the Gruyère and Parmesan cheese and then broil until bubbling and golden brown and the chicken reaches 165 degrees F.

9. Garnish with fresh thyme leaves.

10. Serve with a side of kale Caesar salad, a side of roasted vegetable, mashed or baked potatoes, egg noodles, pasta, or cauliflower rice.


Deep Dish Pizza

 
DeepDishZa_v2_01.jpg

Who doesn’t love pizza??? Tonight it’s deep dish pizza on the menu! This deep dish version of pizza is inspired by a few unique pizza places that feature a partial cheese crust. Inside, delicious layers of flavor are assembled into some sort of pizza heaven. Fresh dough is topped with a layer of cheese, red onions, a robust red sauce, and finally, a hearty serving of spicy sausage - one slice is nearly enough!

Deep Dish Pizza - Sausage & Red Onion with a Crispy, Caramelized, Cheesy Crust
Makes two 12-inch deep dish pizzas - Serves 8

Dough Ingredients:
3/4 cup warm water
2-1/4 teaspoons (or one packet) yeast
1 tablespoon sugar
1 teaspoon kosher salt
2 tablespoons olive oil
2 tablespoons butter, melted
2-1/2 cups all-purpose flour

Pizza Toppings:
1 lb low-moisture mozzarella cheese, sliced in 1/8"-thick slices
8 ounces parmesan cheese, shredded
1 pound sausage, roughly rolled into 1" bite-sized discs
1/2 red onion, thinly sliced

Sauce Ingredients:
2 cloves garlic, minced
2 tablespoon olive oil
1 (28 oz) can petite diced tomatoes
1 (14oz) can crushed tomatoes
1 (6 oz) can tomato paste
2 teaspoons dried basil
2 teaspoons dried oregano
1 teaspoon dried marjoram
1/4 teaspoon fresh ground pepper
1 teaspoon Kosher salt
1 tablespoon sugar

Directions:
1. Prepare the pizza dough by hand or by using a stand mixer. Pour the warm water into a large bowl, and add the yeast. Stir slowly for about two minutes, then add the sugar, salt, olive oil, and melted butter and stir again until combined. Add 1 cup of flour, and stir until combined. Slowly add the remaining 1-1/2 cup of flour until a dough ball has formed. Knead the dough several times until a smooth ball has developed. Cover the dough with a damp cloth and let the dough rise in a warm location for about 1-1/2 hours.

2. Meanwhile, prepare the sauce. Sauté the garlic with the olive oil, stirring until fragrant. Be sure to watch this step carefully so that the garlic doesn't burn! Once the garlic is fragrant, add the diced tomatoes, crushed tomatoes, tomato paste, basil, oregano, marjoram, pepper, salt, and sugar. Bring the sauce to a low simmer and cook stirring as needed for 40-45 minutes or until the sauce has thickened nicely.

3. Use two well-seasoned 12" cast iron pans or deep dish pizza pans. Cover the surface with a generous layer of canola oil on the bottom and sides. Press the dough into the cast iron as a single flat layer and let the dough rise for an additional 30 minutes in the pan. (You can freeze half the ingredients for later.)

4. Preheat the oven to 500 degrees F.

5. Once the dough has risen in the pan, it's time to assemble the pizza. Make a layer of folded mozzarella slices all along the edge of the pan creating a "cheese crust" and then continue to layer on top of the layer of dough. Add the shredded parmesan on top of the mozzarella.

6. Spread the sliced red onions around the pizza on top of the cheese layers.

7. Add a hefty layer of pizza sauce to the pizza covering the onions completely.

8. Finally, top with pizza with the sausage discs.

9. Line a large baking sheet with aluminum foil to place on the oven rack directly below the pizza to catch any drips as the pizza cooks. Turn on a ventilation fan, and perhaps even crack a window. Any cheese that spills over will make a bit of a smoke.

10. Tent a loose piece of aluminum foil over the pizza. Bake for 20 minutes.

11. Check to make sure that the drip pan is correctly aligned to catch any spillage and continue baking for an additional 20-25 minutes or until the pizza crust is well set, the sausage is cooked, and the sauce and cheese below are bubbling hot. The sides of the crust that are made of cheese might look blackened, but they should not taste burnt, instead they will taste of delightful caramelized cheese and help to hold all of the ingredients in place.

12. Let the pizza cool slightly, enough to slide it from the pan onto a parchment paper-lined cutting board. Cut the pizza into slices with a sharp cook's knife working from the cheesy edge into the middle.

13. Pace yourself when enjoying - one pizza is hearty! One 12-inch pizza serves 4 hungry adults.


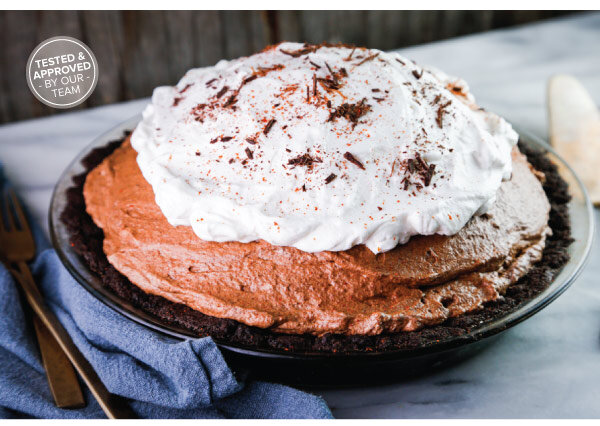
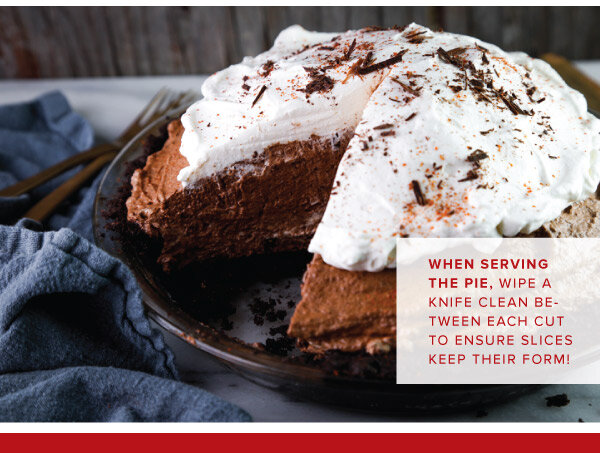
Spicy Chocolate Mousse Pie


In this recipe, we explore the uniquely complex and deeply satisfying flavors of Mexican chocolate. This Spicy Chocolate Mousse Pie boasts a crumbly, chocolate cookie crust, and a mousse so light it almost evaporates in your mouth. Meanwhile, a little sweet heat is left behind ready to tickle your taste buds!

Spicy Chocolate Mousse Pie with Fresh, Homemade Vanilla Whipped Cream
Makes one 9-inch pie

Chocolate Mousse Filling:
1 tablespoon hot water
1/2 teaspoon espresso powder
4 pasteurized egg whites (or 1/2 cup pasteurized liquid egg whites)
1 cup sugar
10 oz. 70% semisweet baking chocolate, chopped, plus some for garnishing
3 tablespoons unsalted butter
2 cups heavy cream, divided
1/2 teaspoon cinnamon
3/4 teaspoon cayenne pepper
1/4 teaspoon salt
1 teaspoon vanilla extract

Crust:
2-1/2 cups chocolate sandwich cookie crumbs (roughly 30 cookies; like Oreos)
1/4 teaspoon cinnamon
1/4 teaspoon instant espresso powder
Pinch of salt
7 tablespoons unsalted butter, plus 1 tablespoon for greasing the pie dish

Vanilla Whipped Cream:
1 cup cold heavy whipping cream
3 tablespoons powdered sugar
1 teaspoon vanilla extract

Directions:
1. Make the crust. Preheat the oven to 325°F. Lightly grease a pie dish pan with 1 tablespoon melted butter.

2. In a food processor, pulse the chocolate cookies (including filling) until fine crumbs form, about 2 minutes. Add the cinnamon, espresso powder and a pinch of salt and pulse a few times to incorporate. In a medium bowl, melt the remaining butter and mix in the cookie crumbs, coating them until the crumbs are coated.

3. Pour the crumb mixture into the pie dish and use the bottom of a measuring cup to press the mixture firmly to the edges to create a crust. Bake for 10 minutes until crust is set. Let it cool to room temperature.

4. Prepare the mousse filling by combining the espresso powder in the hot water, stirring until dissolved. Set aside. In a stand mixer fitted with the whisk attachment, whisk the egg whites and sugar on medium high speed until the whites have tripled in volume and stiff peaks have formed, roughly 5-6 minutes. Use a spatula to scrape the mixture into a large bowl.

5. Clean the mixing bowl and in the stand mixer fitted with the whisk attachment, beat the cream, cinnamon, cayenne, salt, and vanilla on medium-high speed until medium peaks form and the cream is pillowy, roughly 2 minutes. Do not over whisk.

6. Melt the chocolate and butter in a heatproof bowl positioned over a saucepan of simmering water stirring until the chocolate is melted and smooth, roughly 4-5 minutes. Stir in the espresso mixture.

7. Gently fold the chocolate mixture into the egg whites, then gently fold in the whipped cream to the egg and chocolate mixture until no white streaks are left. Do not over mix or the mousse will start to deflate.

8. Use a large spoon to scoop the mousse into the pie dish and spread it evenly over the bottom of the crust. Mound the remaining in the center to be higher than the crust edge. Refrigerate for 1 hour.

9. Make the whipped cream topping by whisking the heavy whipping cream, powdered sugar, and vanilla on medium-high speed until medium peaks form, roughly 2 minutes. Do not over whip or the cream will become curdled and grainy. Top the pie with the whipped cream and refrigerate for at least 4 hours. When ready to serve, sprinkle with the shaved chocolate and dust with a pinch of cinnamon and cayenne, if desired.
 

Scallops with Lemon Pasta

 
Scallops_v2_01.jpg

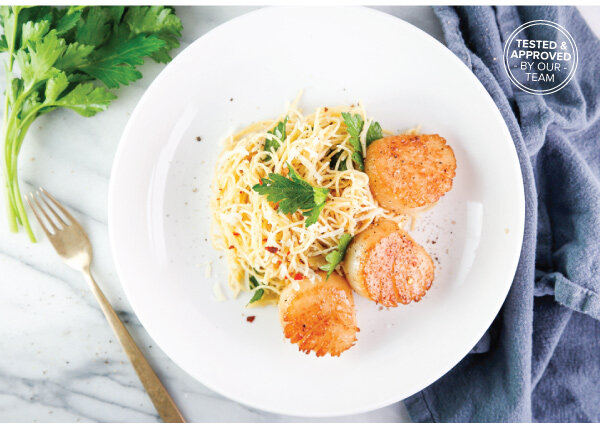
A classic romantic dinner for two, scallops and pasta make a great “date-night in”! Scallops are often referred to as the 'candy of the sea' — and for good reason! When cooked correctly, these beautiful morsels have the most delicate, sweet flavor. This issue showcases how to properly select and cook scallops — a presentation featuring a caramelized crust on the outside and a slightly-sweet, buttery-soft inside. Served on a bed of lemon-enhanced angel hair pasta, this meal is just as filling as it is fancy. 

Sugar-Seared Scallops with Lemon Pasta

Makes 2 generous servings

Sugar-Seared Scallop Ingredients:
10 sea scallops
1/4 teaspoon Kosher salt
1/4 teaspoon black pepper
2 tablespoons butter
2 tablespoons sugar
1 cup dry white wine

Lemon Pasta Ingredients:
1/2 lb angel hair pasta
5 tablespoons butter
5 cloves garlic, thinly sliced
1/2 teaspoon crushed red pepper flake
1-1/2 cup vegetable stock
1 tablespoon fresh lemon juice
1/2 tablespoon lemon zest
2 tablespoons fresh parsley, chopped
1/2 cup shredded parmesan
1/4 teaspoon salt
1/4 teaspoon pepper

Directions:
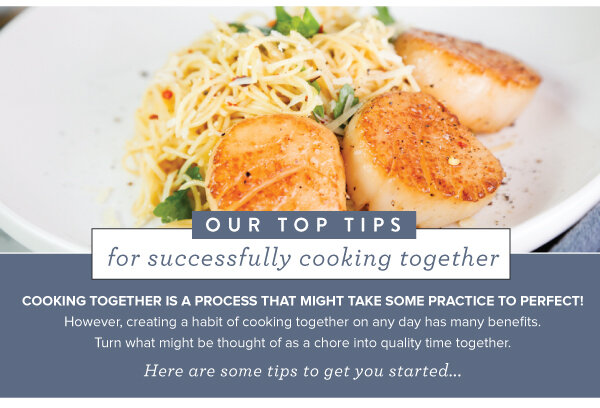
This is a great recipe to make with two chefs working together for a romantic meal! The first chef can focus on the pasta and sauce, while the second can sugar-sear the scallops. With both chefs working simultaneously, this dinner comes together quickly!

CHEF ONE PREPARE THE PASTA:
1. Prepare the pasta sauce by melting the butter over medium heat. Add the garlic and cook for 1 minute until fragrant. Add the crushed red pepper and cook for another minute. Add the vegetable stock, lemon juice, and lemon zest, and cook for 5 minutes to allow the flavors to get friendly.

2. Meanwhile, prepare the pasta by bringing a large pot of water to a rolling boil. Add a healthy dose of salt and add the pasta, cooking until al dente, about 2-3 minutes. Strain the pasta from the water and set aside until the scallops have seared.

CHEF TWO PREPARE THE SCALLOPS:
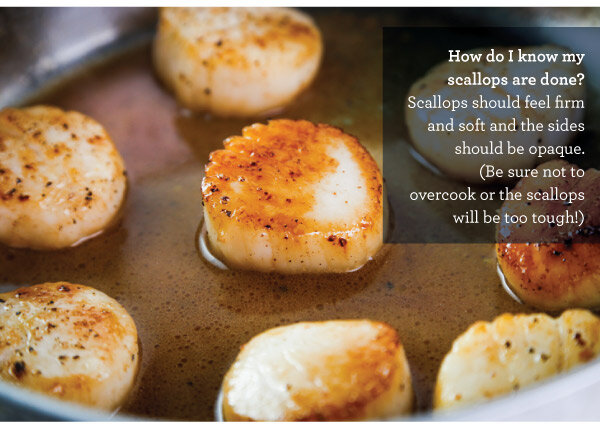
3. While Chef One makes the pasta, Chef Two can prepare the scallops. Gently rinse the scallops and pat dry with a paper towel. Gently remove the side muscle that secures the scallop to the shell, if necessary. Sprinkle the scallops with salt and pepper. Prepare a plate with a layer of sugar. 

4. Sear the scallops. Heat the butter in a skillet on medium-high. While the butter heats, coat both sides of each scallop in sugar. Once the skillet is hot, work in two batches to cook the scallops. Place the scallops sugar-side down on the skillet, spacing them at least 1 inch apart, making sure not to crowd the pan. The scallops should sizzle on contact with the pan. If they start to brown too quickly, reduce the heat. Use tongs to gently flip and cook scallops for 2-3 more minutes. Scallops should release easily from the pan when they are ready to be turned. Remove the first batch of scallops from the pan and cook the second batch, reserving the pan juices. Deglaze the pan by adding the wine, and continue to cook the scallop juices and wine for another minute. Remove from the heat and set aside.
WORK TOGETHER TO PLATE THE DINNER: 
5. Just as the scallops finish searing, have Chef One stir the cooked pasta into the sauce. Use tongs to make sure the sauce fully coats the pasta. Sprinkle with parsley and parmesan and toss. 6. Artfully plate the pasta and have Chef Two add the seared scallops on top. Drizzle the seared scallops with any remaining scallop pan juices. Sprinkle with additional salt and pepper and serve immediately. Enjoy!


Cod Provencal

 
Cod_v2_01.jpg

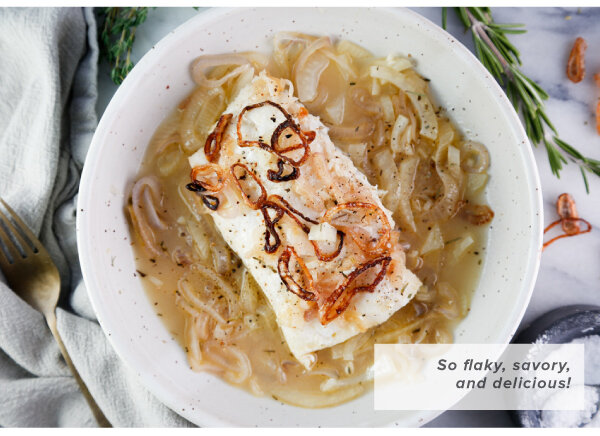
Try this warming and delicate seafood preparation garnished with captivating crispy shallots. This recipe will provide all the tips for mastering, with ease, a beautiful, flavor-packed dish you’ll enjoy making time and time again with a variety of different fish.

Poached Cod Provencal
Serves 2

Ingredients:
1 lb cod fillets
1/3 cup lime juice, freshly squeezed
3 large shallots, sliced into rings, divided
4 tablespoons butter, divided
1/2 cup vegetable oil
2 cloves garlic, thinly sliced
1/2 cup vegetable broth
2 tablespoons sherry
2 tablespoons fresh fennel, thinly sliced
1/2 teaspoon Herbes de Provence
1/4 teaspoon Kosher salt
1/4 teaspoon black pepper

Directions:
1. In a 9" x 13" baking dish, marinate the cod in fresh lime juice for 20-30 minutes flipping halfway through the marinating time.

2. While the cod marinates, prepare the sautéed shallots. Melt 2 tablespoons of butter in a 3-1/2 qt braiser over low heat. Add half of sliced the shallots. Sauté the shallots for about 15 minutes, or until the have lightly caramelized. Stir occasionally until the shallots turn translucent and begin to turn a golden brown.

3. Meanwhile, prepare the crispy shallot garnish. Add the vegetable oil to a skillet or saucepan and heat over medium-high heat. Once hot, add the remaining shallots and cook for 2-3 minutes until just browned and crispy. Remove the crispy shallots from the heat and rest on a paper towel-lined plate. Lightly salt. Reserve the crispy shallots for garnish.

4. In the braiser, add the the garlic and the remaining 2 tablespoons of butter to the sautéed shallots and heat for about 1 minute. Deglaze the garlic and shallots with the sherry, heating for one minute, then add the vegetable stock, Herbes de Provence, and fennel. Bring the ingredients to a boil, then reduce the heat and simmer until the flavors become friendly, about 5 minutes.

5. Add the marinated cod, sprinkle with the salt and pepper, then cover. Continue to cook on low and poach the cod until the cod is opaque and cooked through, roughly 8-10 minutes.

6. Serve the cod with a spoonful of the braising liquid and a sprinkle of crispy shallots. Enjoy immediately.


Classic Minestrone Soup

 
Minestrone_v2_01.jpg

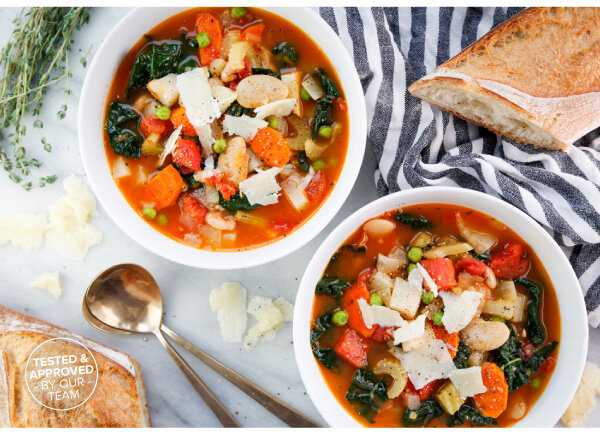
Minestrone, a classic Italian soup, features a wide range of  vegetables, beans, and pasta. Our recipe version focuses on techniques for building great flavor in stages. The result? Deep, rich, satisfying tastes and textures without being over-cooked. You’ll find this soup highly flexible – use seasonal vegetables, or whatever you have on hand.  We think you’ll agree that this minestrone easily earns its reputation as a healthy, winter comfort food.
Comforting Minestrone Soup
Serves 4 - 6

Ingredients:
4 tablespoons olive oil
1 yellow onion, diced
3 celery stalks, dice
2 carrots, cut on the bias into slices
2 small potatoes, cut into 1/2" cubes
3 cloves garlic, minced
1/2 tablespoon tomato paste
2 bay leaves
1 Parmesan cheese rind
1 can (28 oz) diced tomatoes
6 cups vegetable broth
1 can (15.5 oz) Great Northern beans
1 can (15.5 oz) butter beans
1 cup ditalini pasta (or other small pasta)
1/2 teaspoon Kosher salt
1/2 teaspoon pepper
2 sprigs fresh thyme
1/4 teaspoon red pepper flakes
1 tablespoon red wine vinegar
1 cup frozen peas
3 cups chopped kale
Parmesan cheese, shaved, for serving

Directions:
1. Start by making the mirepoix. Heat the olive oil in a large Dutch oven over medium-high heat. Add the onions and sauté for about 3 minutes until softened. Add the celery and carrots, and continue to cook for another 3-5 minutes, or until softened.

2. Add the potatoes and garlic and continue to cook for another 5 minutes. Stir in the tomato paste.

3. Add the bay leaves, Parmesan rind, canned tomatoes, vegetable broth, Great Northern and butter beans, ditalini pasta, salt, pepper, thyme, and red pepper flakes. Bring to a boil over medium-high heat.

4. Reduce the heat to medium-low and simmer the soup for another 20-25 minutes. Use tongs to remove the Parmesan rind, bay leaves, and thyme stems.

5. Stir in the red wine vinegar, frozen peas, and chopped kale. Cook for one more minute, or until the kale just begins to wilt. Serve with shaved Parmesan cheese as a garnish on top.


Manchego and Thyme Popovers

 
Popovers_v2_01.jpg

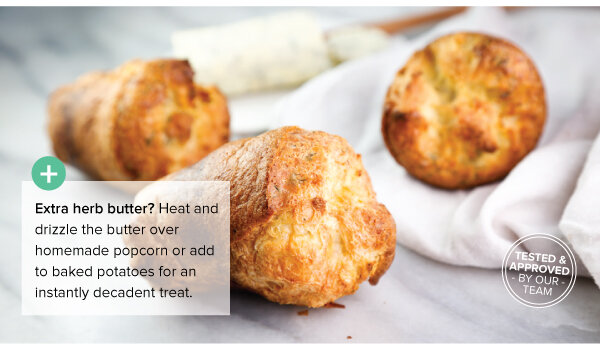
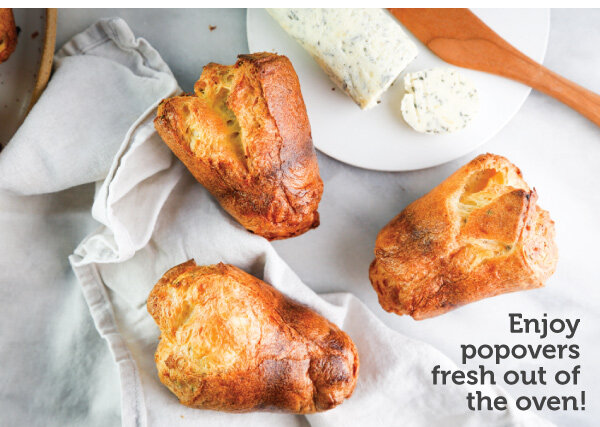
Popovers are impressive, high-rising rolls with a soft, airy inside and a crispy, crunchy exterior. These delectable morsels are meant to be enjoyed freshly baked straight out of the oven. IN THIS ISSUE, we feature Manchego and Thyme Popovers with an Herb Butter that would be enjoyably delicious as a savory breakfast, or as a side at lunch or dinner! 

Manchego and Thyme Popovers with Herb Butter
Makes 12 popovers

Popover Ingredients:
1-1/2 cups all purpose flour
1 teaspoon Kosher salt
1/2 teaspoon fresh ground black pepper
1 tablespoon fresh thyme, finely chopped
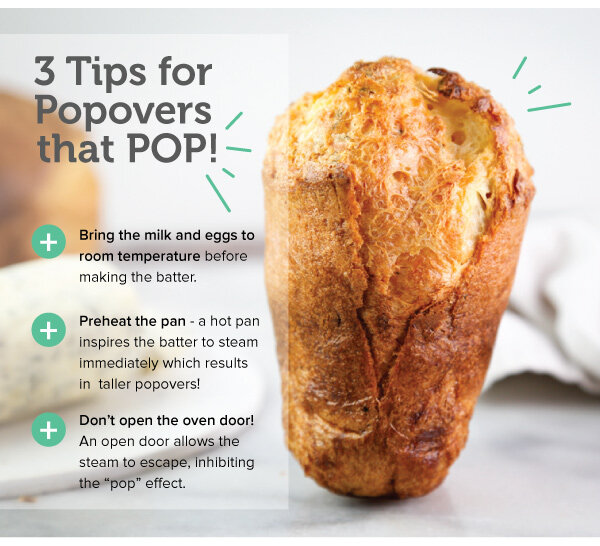
4 large eggs, room temperature
1-1/2 cups whole milk, room temperature
1/2 cup Manchego cheese, finely grated
2 tablespoons unsalted butter, melted (for greasing the popover pan)

Herb Butter Ingredients - makes 1/2 cup
1/2 cup (I stick) unsalted butter, softened to room temperature
1 garlic clove, minced
1 tablespoon fresh sage, finely chopped
1 tablespoon fresh rosemary, finely chopped
1/4 teaspoon Kosher saltPopover

Directions:
1. Preheat the oven to 450°F. Place the empty pan in the oven while it preheats. 

2. In a medium bowl, combine the flour, salt, and pepper and mix with a fork for about 30 seconds to incorporate evenly. Add the thyme and continue mixing until evenly distributed.

3. In a large bowl, whisk the eggs and whole milk together until contents are frothy, about 5 minutes.

4. Slowly add the flour mixture to the egg mixture and continue whisking until all the ingredients are combined and the batter is the consistency of thick cream. (Try not to over whisk!) Stir in the cheese.

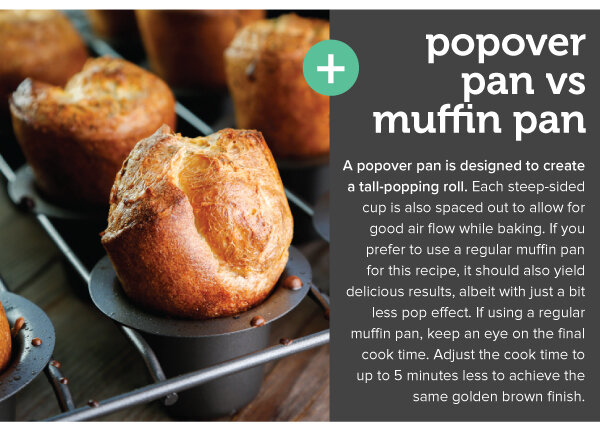
5. Remove the preheated popover or mun pan from the oven and brush the cups with the melted butter. Fill the cups 3/4 full with the batter. Bake the popovers on the lowest rack for 20 minutes. After 20 minutes, reduce the temperature to 350°F, ensuring the oven door stays closed so no steam escapes (this is crucial to getting the pop effect!). Continue to bake for another 20 minutes, or until golden brown.

6. Remove popovers from the oven and serve hot with herb butter. If not serving right away, remove popovers from the pan and cool on a wire rack immediately to keep that delightful crunch!

Herb Butter Directions:
1. In a small bowl, combine all of the ingredients together and mix with a fork or a hand mixer until the herbs and garlic are distributed evenly. 

2. Transfer the butter onto a sheet of plastic wrap and roll into a cylinder. Twist the ends of the plastic wrap tightly and refrigerate for at least one hour until cold and solid.

3. Serve herb butter alongside warm popovers in a small dish. Butter is best when enjoyed within 1 week, but can be frozen for up to two months. To freeze, simply wrap the plastic wrapped butter in parchment paper and freeze in a freezer bag, removing excess air. Extra herb butter? Heat and drizzle butter over homemade popcorn or add to baked potatoes.


Winter Bowls

 
WinterBowl2021_v2_01.jpg

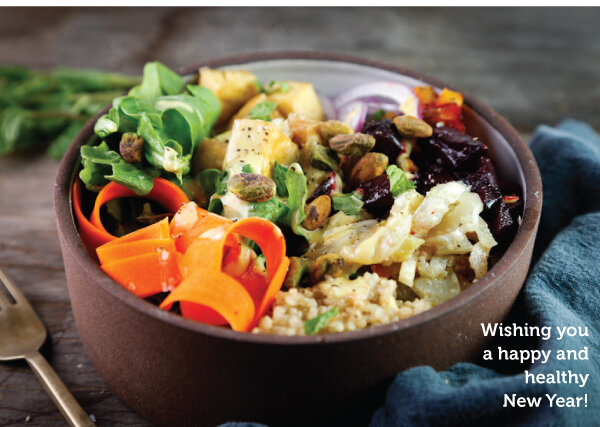
The season for healthier dinners has arrived! Each January inspires a renewed energy and recommitment to healthier habits. Winter grain bowls are a delicious way to achieve those goals! This tasty bowl features baked tofu with quinoa, roasted beets, and arugula all dressed with a flavorful turmeric tahini dressing.

Winter Grain Power Bowls Makes 4 large bowls

Winter Grain Bowl Ingredients:
1 block extra firm tofu 1 large purple beet (or two small beets), peeled & diced into 1/2" cubes
1 large golden beet (or two small beets), peeled & diced into 1/2" cubes
1 fennel bulb, stalks removed, cored, and thinly shaved
3 tablespoons olive oil, divided
1/2 teaspoon salt, divided
1/4 teaspoon pepper, divided
1 cup quinoa
2 cups vegetable stock
1 tablespoon cornstarch
1 red onion, thinly sliced with a mandoline
1 large carrot, shaved and rolled
4 cups arugula
1/3 cup shelled pistachios
Fresh mint leaves, torn for garnish

Turmeric Tahini Dressing Ingredients:
3 tablespoons olive oil
1/4 cup tahini
1 teaspoon fresh ginger, minced
2 tablespoons fresh lemon juice (about 1 large lemon)
2 tablespoons water (as needed, to thin)
1/4 teaspoon of kosher salt
1/4 teaspoon cayenne pepper
1/2 teaspoon turmeric
1 clove garlic, minced

Directions:
1. Prepare the tofu by slicing it into 1" thick slices. Lay the slices on a paper towel-lined baking sheet, then cover the tofu with another layer of paper towels. Place a cutting board on top of the covered slices to press out the excess water from the tofu. (Place a cookbook or a heavy pot on top of the cutting board to help apply weight and pressure so that extra water is forced out of the tofu. This pressing and draining step will help the tofu achieve a better texture when baking.) Press and drain the tofu slices for about 20-30 minutes.

2. Preheat the oven to 400°F. In two separate bowls, prepare the beets and fennel. Toss the diced beets with 1 tablespoon olive oil, 1/8 teaspoon salt, and 1/8 teaspoon pepper. Toss the shaved fennel with 1 tablespoon olive oil, 1/8 teaspoon salt, and 1/8 teaspoon pepper. Place the prepared beets and fennel in a large roasting pan and roast for 15 minutes or until the fennel starts to turn golden brown. Remove the fennel and continue roasting the beets for another 15 minutes, or until the beets are fork tender.

3. Meanwhile, prepare the quinoa on the stovetop using a 2:1 liquid-to-grain ratio. Bring the vegetable stock to a boil and add the quinoa. Stir, cover, and turn down the heat to low. Check after 15 minutes to see if the quinoa is tender, or if more liquid is needed to finish cooking. The small kernels expand as they soak up the cooking liquid. When tender and ready, you’ll see a tiny curlicue emerge; this is the beginning of a quinoa sprout, (and a sign of doneness.) Remove from the heat when done.

4. After the tofu has drained, remove the weights and paper towels and cut the tofu slices into 1" cubes. Gently toss the tofu cubes with 1 tablespoon olive oil, 1/4 teaspoon salt, and 1 tablespoon cornstarch until evenly coated. Spread the tofu cubes across a lined baking sheet and bake in the oven at 400°F for 30 minutes. Half way through baking, turn the tofu pieces. Bake until the tofu is baked and crisped on all sides.

5. Prepare the turmeric tahini dressing by whisking all of ingredients together until the dressing is combined.

6. Thinly slice the red onion using a mandoline. Shave the carrot into ribbons using a vegetable peeler. Tear the mint leaves for a garnish.

7. Once all of the ingredients are prepared, assemble the bowls. Add a scoop of cooked quinoa to each bowl, then add the roasted beets, roasted fennel, and baked tofu. Continue building the bowl by adding a few slices of red onion, a few ribbons of carrot, and a handful of arugula. Drizzle the bowl with the dressing and then garnish with pistachios and fresh mint leaves.


Shrimp Cocktail & Gin Martinis


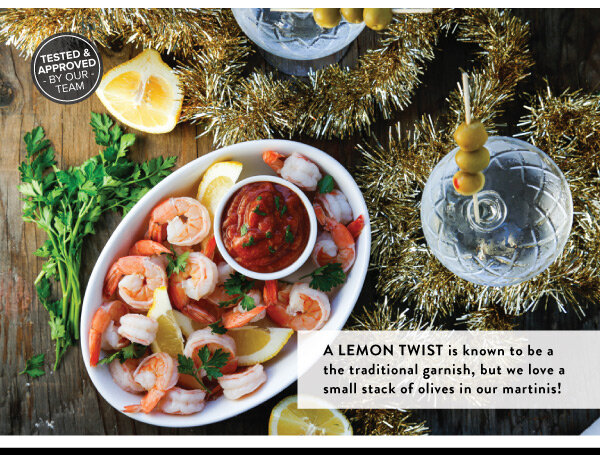
Even if you’re having a solo party this New Year’s Eve, you still deserve to celebrate the fact that 2020 is almost behind us -- and what a year it has been! IN THIS ISSUE we welcome 2021 with perfectly poached shrimp cocktails and ice cold gin martinis. Bottoms up . . . and ONWARD!

Classic Shrimp Cocktail and Gin Martinis

Shrimp Ingredients: (Serves 4)
24 large, 21-25 count deveined shrimp (keep tail intact)
2 lemons, 1 juiced and 1 cut into wedges
1 small onion, cut into wedges
3 cloves garlic, smashed
1 stalk celery cut into large pieces
2 bay leaves
1 teaspoon Kosher salt
1 teaspoon sugar
1 teaspoon peppercorns

For Garnishing:
Several sprigs of Italian parsley
1 lemon, cut into wedges

Homemade Cocktail Sauce Ingredients:
3/4 cup ketchup
2 tablespoons prepared horseradish
1/4 teaspoon salt
1/2 teaspoon Worcestershire sauce
1 teaspoon lemon juice
1/2 teaspoon Tabasco sauce (optional)
1/4 teaspoon celery salt

Classic Gin Martini: (Serves 1)
3 oz. gin (chilled in the freezer)
1/2 oz. dry vermouth (chilled in the refrigerator

Garnish:
3 pimento-stuffed olives or lemon twist

Shrimp Cocktail Directions:
1. Combine lemon wedges, lemon juice, onion, garlic, celery, and bay leaves in a large pot filled 3/4 full with water. Bring the water to a boil and add the salt, sugar, and peppercorns. Once the water comes to a rolling boil, remove the pot from heat. Add the shrimp to the hot water and cover with a lid. Let the shrimp cook in the hot water for 5-8 minutes until shrimp are pink and opaque. 

2. While the shrimp are poaching, fill a large bowl with ice and water. Once shrimp are cooked, remove from the hot water by straining in a colander; discard the remaining contents. Plunge the shrimp into the ice and water and let them chill completely. Drain and serve immediately, or chill in the refrigerator for up to 12 hours.

3. While the shrimp are chilling, make the cocktail sauce by combining the cocktail sauce ingredients in a small bowl or wide-mouthed glass.

4. Serve the shrimp in glasses for individual servings, or on a large platter for serving a small group. Garnish with fresh lemon wedges and sprigs of parsley leaves.

Classic Gin Martini Directions:
1. Place martini glasses in the freezer to chill.

2. Meanwhile, combine gin and vermouth in a mixing glass full of ice. Stir for 30 seconds.

3. Strain into a chilled martini or coupe glass and garnish with olives or a lemon twist. Enjoy immediately!


Winter Pear Galette


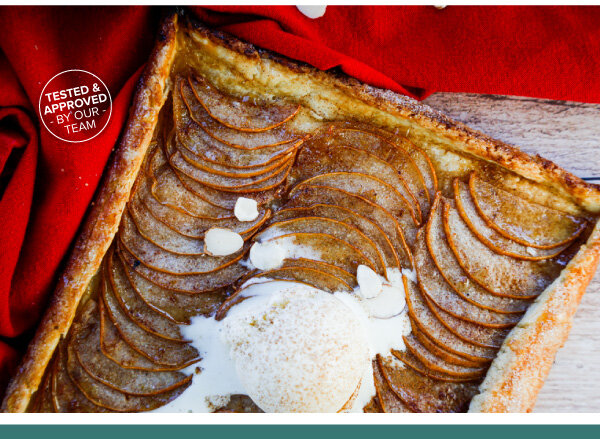
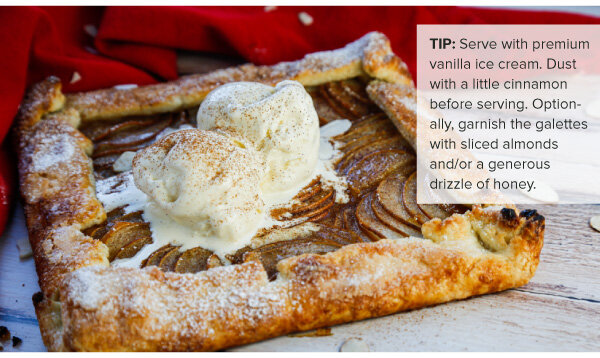
Warm, spicy pears are our winter season indulgence, and we couldn’t be happier about it! In this recipe, we share our simple go-to pastry crust that comes together quickly for this impressive dessert. The warm cinnamon-y pears and flaky crust topped with cold, vanilla bean ice cream completes any occasion in sweet style.

Winter Pear Galette
Serves 4

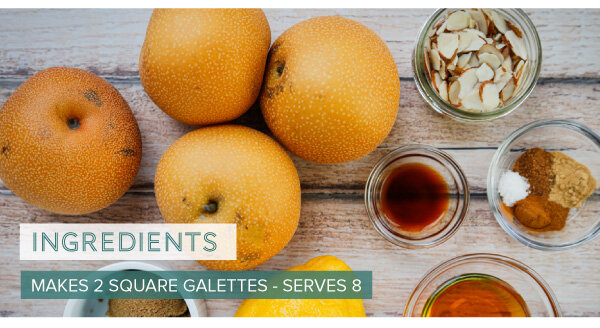
Filling Ingredients:
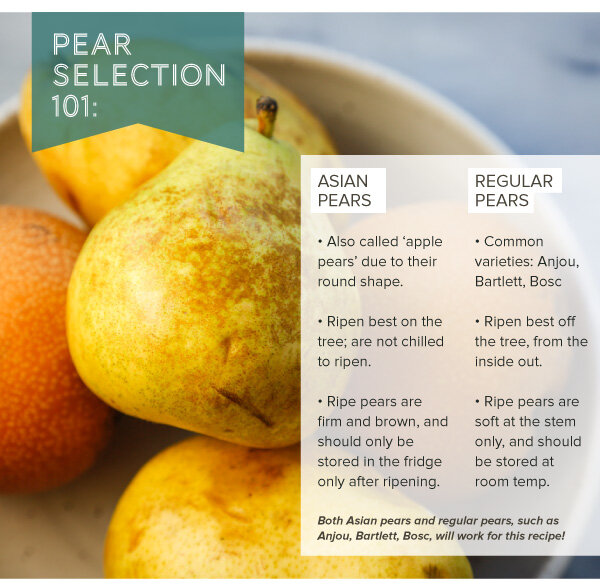
3 Asian pears, cored and cut into thin 1/8" slices using a mandoline
3 tablespoons brown sugar
1 teaspoon pure vanilla extract
2 teaspoons finely grated lemon peel
1 teaspoon lemon juice
1/2 teaspoon cinnamon
1/4 teaspoon nutmeg
1/4 teaspoon ginger
1/4 teaspoon Kosher salt
2 tablespoons unsalted butter, chilled and cut into small pieces
1/4 cup slivered almonds
1/3 cup honey (for drizzling)

Crust Ingredients:
2-1/2 cups all-purpose flour
1 tablespoon sugar
1-1/2 teaspoons Kosher salt
1 cup unsalted butter (2 sticks), grated and well chilled
4-6 tablespoons ice water

Crust Topping:
1 egg, whisked for egg wash
1 tablespoon coarse sugar

For Serving:
Vanilla Ice cream
Sprinkle of cinnamon
1/4 cup slivered almonds, optional
1/3 cup honey for drizzling, optional

Directions:
(The crust may be mixed by hand or with a food processor. )
1. For the crust, mix the flour, sugar, and salt together in a large bowl with a whisk until evenly distributed.

2. Prepare the ice water by filling a small bowl with ice cubes and adding water.

3. Place the grated butter in the flour mixture. Using a pastry blender, cut the butter and flour mixture together until a coarse texture is reached with some pea-sized pieces of butter remaining.

4. Add 2 tablespoons of the ice water by sprinkling on top of the flour/butter mixture. With a fork, gently toss the mixture. Continue adding ice water one tablespoon at a time tossing after each addition until a rough ball of dough forms. (Avoid adding too much water.)

5. Flatten the dough ball into a disk about a one-inch thick, and wrap in plastic wrap.

6. Chill the wrapped dough disk for an hour or overnight.

7. On a pastry slab or a cutting board, divide the dough into two even balls. Place the first half of the dough directly on a sheet of parchment paper and roll into a rough square, about 1/8-inch-thick. Create a straight edge by folding 1” of the dough onto itself around the perimeter. Chill for 15 minutes. While the first half is chilling, prepare the second half of dough into a square, as well, chill.

8. Preheat the oven to 425° F.

9. Meanwhile, prepare the filling. In a large bowl, mix the pear slices with the brown sugar, vanilla, lemon peel, lemon juice, cinnamon, nutmeg, ginger, and salt. Toss until evenly coated.

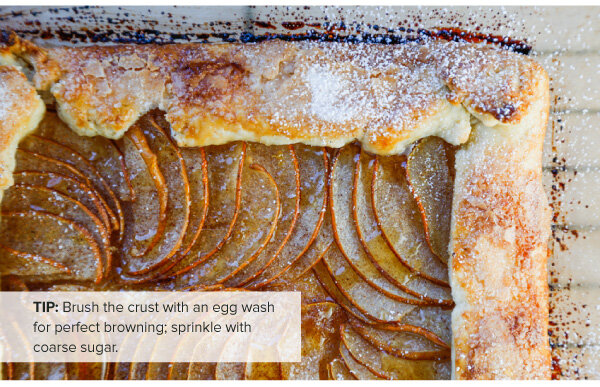
10. Assemble the galettes. Group pear slices together, and carefully arrange overlapping the slices.

11. Distribute the butter pieces evenly on the pears and use a pastry brush to brush the crust with the lightly beaten egg. Sprinkle the coarse sugar on top of the crust.

12. Bake for about 30 minutes, or until the crust lightly browns. Serve with vanilla ice cream and a sprinkling of cinnamon while still slightly warm.


Green Chile & Cheese Egg Bake Bites


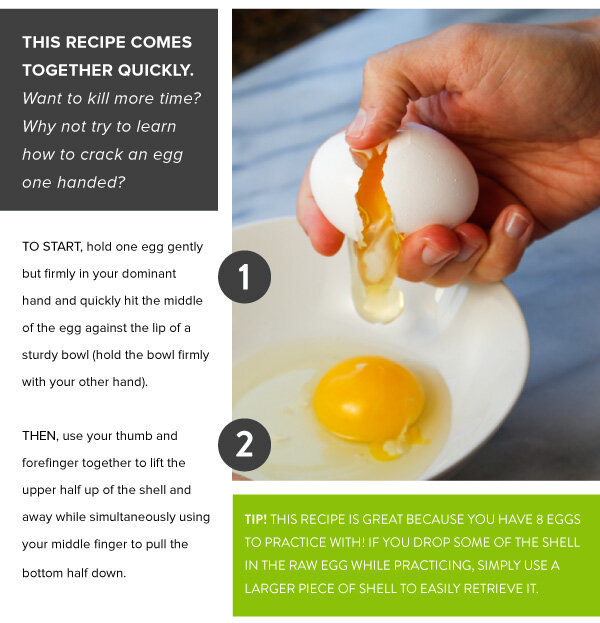
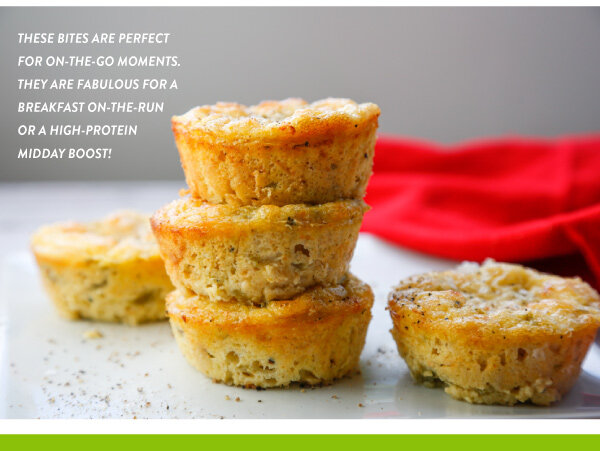
Holiday preparations are in full swing, and that means busier mornings and weekends.  We find ourselves searching for protein-packed recipes that come together in a snap. These featured savory egg bake bites are just that! IN THIS ISSUE we share our favorite recipe for petite-sized breakfast bites, along with tips on how to crack an egg one-handed. 

Green Chile & Cheese Egg Bake Bites
Makes 12 egg bites

Busy mornings are the norm! We often find ourselves searching for satisfying, protein-packed recipes that come together in a snap to help us approach the day with some solid nourishment. You’ll find that these savory egg bake bites are just that -- delicious, satisfying, and easy!

Ingredients:
1/2 cup butter, melted, plus 2 tablespoons softened
1/4 cup flour
1/2 teaspoon baking powder
1/4 teaspoon Kosher salt
1/2 teaspoon pepper
1/2 teaspoon paprika
8 eggs
3/4 cup small curd cottage cheese
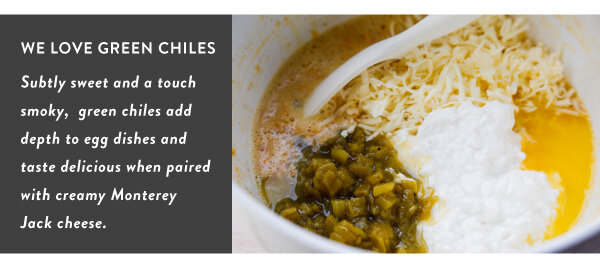
7 oz can chopped green chiles
2 cups grated Monterey Jack cheese (about 8 oz)

Directions:
1. Preheat the oven to 350°F. Generously butter the cups of a standard-sized mun pan with the softened butter.

2. In a medium bowl, mix together the flour, baking powder, salt, pepper, and paprika.

3. In a large bowl, whisk the eggs. Slowly add the dry ingredients to the egg mixture and whisk to combine.

4. Stir in the melted butter, cottage cheese, green chiles, and Monterey Jack cheese and continue stirring until the ingredients are incorporated.

5. Use a measuring cup to evenly distribute the egg mix into the 12 prepared cups of the mun pan.

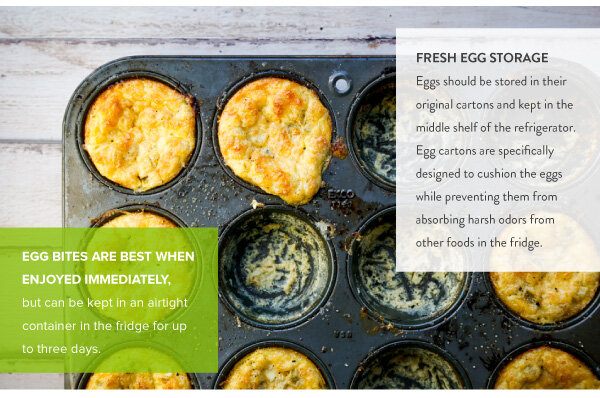
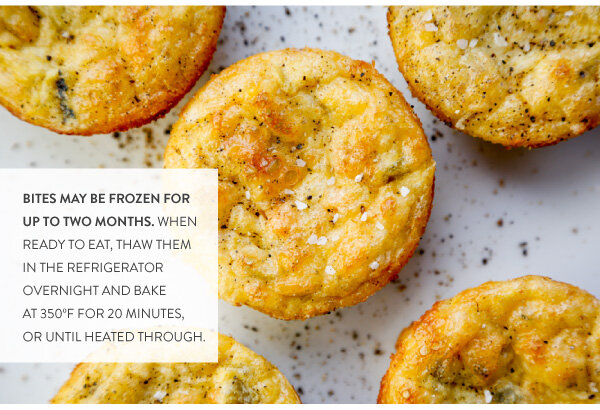
6. Bake until set, about 20-25 min. Let the egg bake bites cool in the pan before removing. Eat while warm or store in the refrigerator for 3 days in an air-tight container, or wrap well and store in the freezer for up to two months.