Coq au Vin


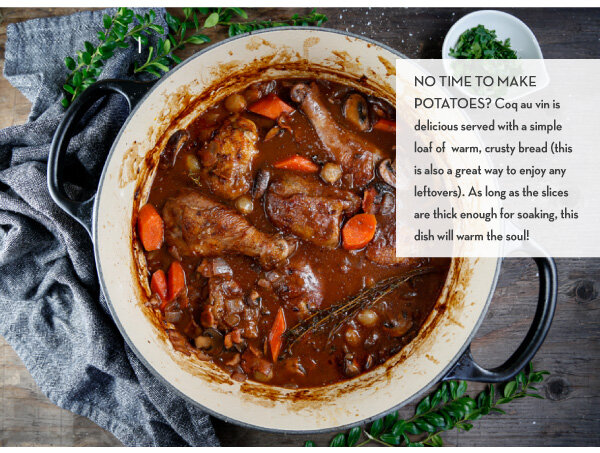
Coq au Vin or "rooster in wine" is a traditional French peasant stew that became popular thanks to Julia Child's encouragement. While the original recipe might turn a tough old rooster into something delicious,  it's equally delightful with chicken thighs and or legs. Red wine, mushrooms, bacon, onions, and thyme all infuse wonderful flavors into this ultimate comfort food dish. A slow braising technique coaxes a mélange of easy ingredients into a dance of gustatory perfection!
Coq au Vin - Chicken in Wine
Serves 4 - 6

Ingredients:
1/2 lb bacon, diced
4 drumsticks, skin on and bone-in
4 chicken thighs, skin on and bone-in
1/2 teaspoon Kosher salt
1/2 teaspoon fresh ground pepper
2 tablespoons olive oil
1 onion, diced
2 cloves garlic, minced
4-5 large carrots, cut into 1-inch diagonal pieces
3 tablespoons flour
2 tablespoons tomato paste
1 tablespoon brandy
2 cups red wine (a good red wine like a pinot noir)
1 cup chicken broth
8-10 sprigs of fresh thyme
2 tablespoons butter
1/2 lb frozen small pearl onions
8 oz cremini mushrooms, sliced
Chopped parsley, for garnish

Directions:
1. Preheat the oven to 325 degrees F. 

2. Prepare the onions, garlic, and carrots.

3. In a large Dutch oven fry the bacon until crisp. Remove the bacon, and drain on a paper towel-lined plate.

4. Remove most of the bacon fat, leaving about 3-4 tablespoons in the Dutch oven.

5. Sprinkle the chicken pieces with Kosher salt and pepper. Sear the chicken legs and thighs on all sides in the Dutch oven until the skin is a crispy golden brown, then remove the chicken pieces.

6. Add 2 tablespoons of olive oil to the pot and sauté the diced onions until softened and translucent.

7. Add the garlic and carrots to the onion and sauté for a few more minutes until the garlic is fragrant.

8. Dust the vegetables with 3 tablespoons of flour and stir until coated. Cook for about 2 minutes.

9. Add the tomato paste and cook until fragrant, then add the brandy to the mixture. Cook the brandy down for a minute, then continue to deglaze the pan with the red wine. Add the chicken broth and stir until combined. Add the seared chicken pieces back to the pot with the cooked bacon, and the sprigs of thyme.

10. Cover the pot and place in the oven. Bake for 20-40 minutes or until the chicken is tender and cooked to 165 degrees F.

11. While the chicken is baking, prepare the mashed potatoes.

12. While the chicken bakes, prepare the pearl onions. In a skillet, sauté the pearl onions in two tablespoons butter until they are lightly golden brown on all sides.

13. Then, sauté the mushrooms in the same skillet, adding olive oil as needed, and cook until browned.

14. Add the cooked pearl onions and mushrooms to the Dutch oven. Carefully taste and season with additional salt and pepper, as needed. If needed, continue to simmer on the stovetop to thicken the sauce. The sauce will also thicken more as it cools.

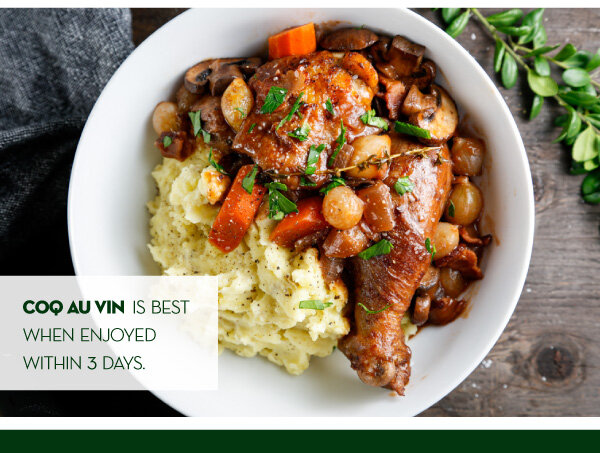
15. Serve the Coq au Vin on a bed of mashed potatoes (or egg noodles or cauliflower rice), and garnish with fresh parsley.


Salted Caramels

 
Caramels_2020_v2_01.jpg

Everyone loves the captivating flavors of fresh homemade caramels! 

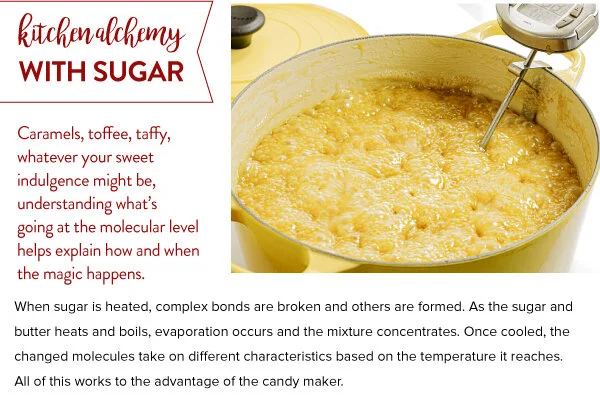
The little known secret? They are deceptively easy to make. Fresh, homemade caramels make great treats for sharing as little gifts in the holiday weeks ahead. IN THIS ISSUE, we show you, step-by-step, how to  master boutique caramels made in your own kitchen.

Handcrafted Caramels
Makes about 120 - 140 pieces, depending on size

Ingredients:
Vegetable oil (for coating pan)
3 cups heavy cream
3 cups granulated white sugar
1 cup brown sugar, packed
2 cups light corn syrup
1-1/2 teaspoons Kosher salt
1/2 cup (1 stick) unsalted butter
2 teaspoons vanilla extract

Directions:
1. Prepare a 9 x 13 rimmed pan prior to starting to cook. Oil the bottom and sides of the pan well using a tasteless vegetable oil, one that stays liquid at room temperature. Line the pan with a criss-cross of parchment paper cut to match the pan’s size with a little extra at the ends; avoid any wrinkles in the corners. Set aside.

2. Wipe the interior of a large saucepan or Dutch oven with a light coating of oil. Measure the heavy cream, sugars, light corn syrup and salt into the pan. Over medium-low heat, stir the ingredients together until well-combined and the sugar is dissolved.

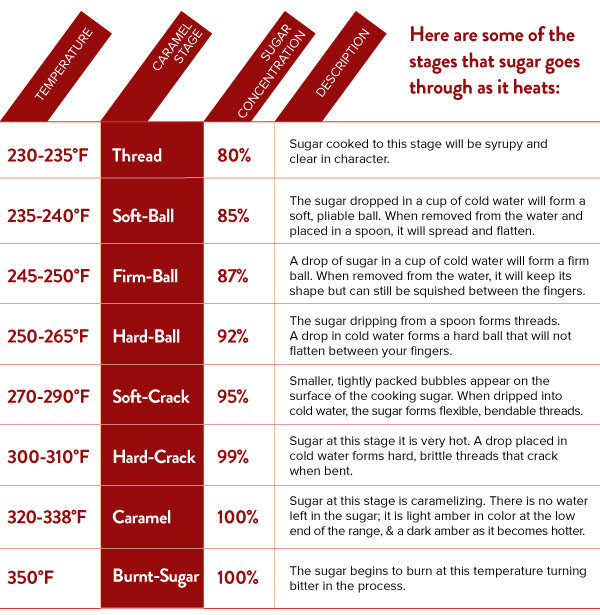
3. Increase the heat to medium. Continue stirring until the cream-sugar mixture reaches a boil. Stop stirring. Using a brush dipped in warm water, wash down any sugar crystals that may have formed on the edge of the pan. Allow the mixture to cook, without stirring, until it reaches the firm-ball stage, around 248°F as measured on a candy thermometer clamped to the side of the pan. (If you do not have a candy thermometer, use a water test to check for the appropriate sugar stage. A drop (approximately 1/4 teaspoon) of caramel in cold water should form a firm ball, yet be pliable.)

4. Remove the caramel from heat, add the butter and vanilla stirring until melted and well-combined with the cream-sugar mixture. (Cutting the butter into half-inch cubes will help to efficiently melt and distribute this key ingredient.)

5. Carefully pour the caramel into the prepared, lined pan. Allow the caramel to set and cool to room temperature. This will take several hours or overnight. (For evenly sized caramels, make sure the pan is setting on a level surface.)

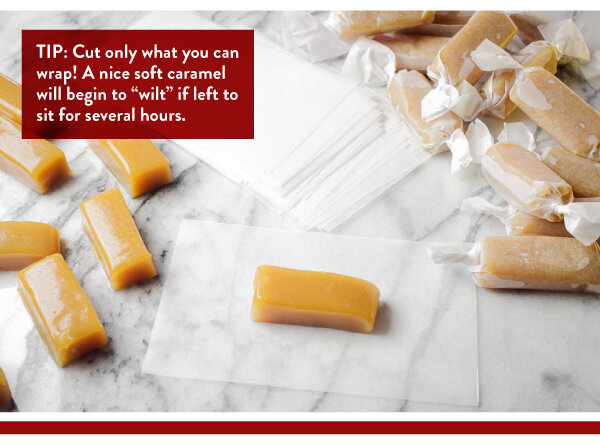
6. Once cooled, lift the sheet of caramel from the pan to a safe cutting surface. The caramel should retain its shape. Neaten the edges of the caramel to remove the rounded edges. Cut the caramel slab vertically and horizontally in desired sizes and shapes with a long-bladed cook’s knife. We suggest 1-1/4-inch by 1/2-inch pieces, or 1-inch squares. Wrap the pieces in nonstick wrap such as parchment paper. Store at cool room temperatures for up to 2-3 weeks.


Wine Poached Pears


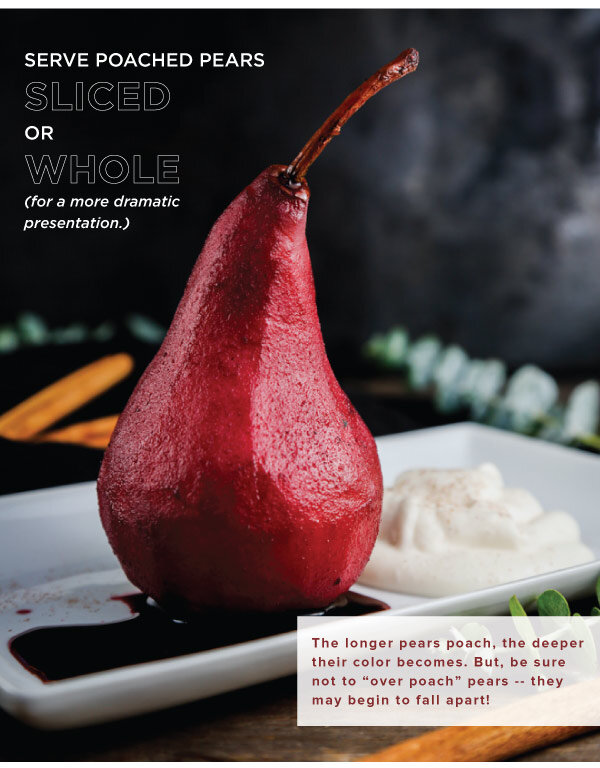
When we want to embrace the beauty of the season, we turn to wine poached pears. THIS ISSUE features poached pears, served alongside vanilla bourbon mascarpone whipped cream. The subtle sweetness of this dish is exactly what we need to offset any holiday sugar highs, and nothing looks more striking.

Wine Poached Pears with Bourbon Mascarpone Whipped Cream
Makes about 4 poached pears

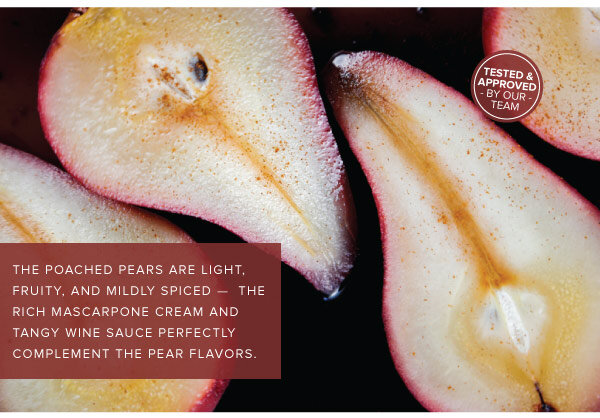
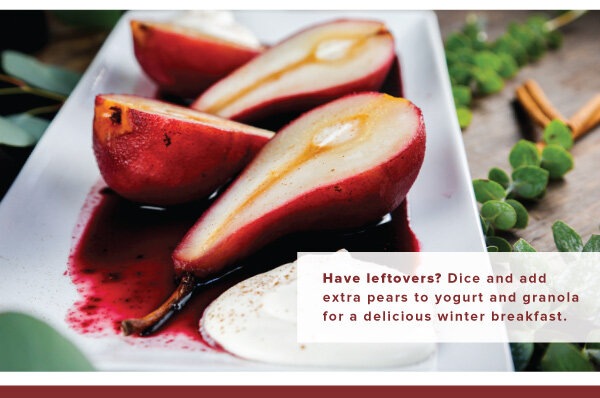
When we want to embrace the beauty of the season, we turn to wine poached pears. This recipe features poached pears, served alongside vanilla bourbon mascarpone whipped cream. The subtle sweetness of this dish is exactly what we need to offset any holiday sugar highs, and nothing looks more striking.

Ingredients:
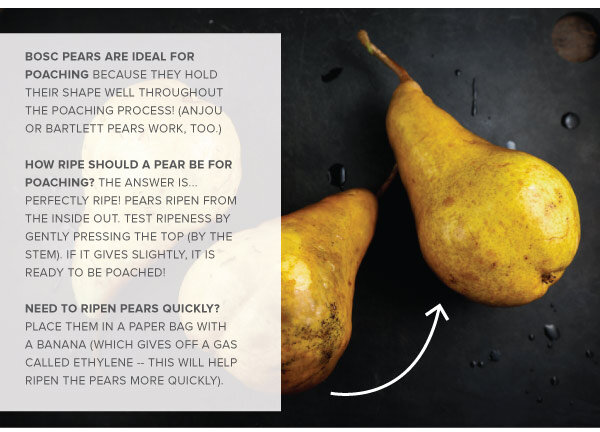
4 Bosch pears, peeled with stem in-tact
1 bottle of dry red wine (750ml)
1 cup water
1/4 cup sugar
3 sticks of cinnamon
1/4 teaspoon cardamom
1 vanilla bean pod, halved and seeds scraped

Bourbon Mascarpone Whipped Cream Ingredients:
4 oz Mascarpone cheese
1/4 cup powdered sugar
1 cup cold heavy whipping cream
1 tablespoon bourbon
1/2 teaspoon vanilla extract

Directions:
1. Peel the pears, carefully leaving the stems in place.

2. Combine the red wine, water, sugar, cinnamon, cardamom, and vanilla bean seeds in a sauce pan and bring to a simmer. Stir until the sugar dissolves. Add the peeled pears making sure they are covered in the liquid. Simmer for about 40 minutes, or until the pears are tender and red, then chill the pears. Cook the wine mixture down into a sauce by simmering for an additional 45 minutes - 1 hour, or until your desired sauce consistency is reached.

3. Attach a chilled mixing bowl to a stand mixer with a whisk attachment. Add the mascarpone cheese and sugar and mix together on high until fully combined, about 3 minutes. Add the cream, bourbon, and vanilla extract, and mix ingredients together, starting on low speed, then increasing to a high speed, whipping until soft peaks form, roughly 8 minutes.

4. Serve immediately alongside the chilled pears, drizzle with the reduced wine sauce, and sprinkle with cinnamon.


Chocolate Orange Holiday Cookies


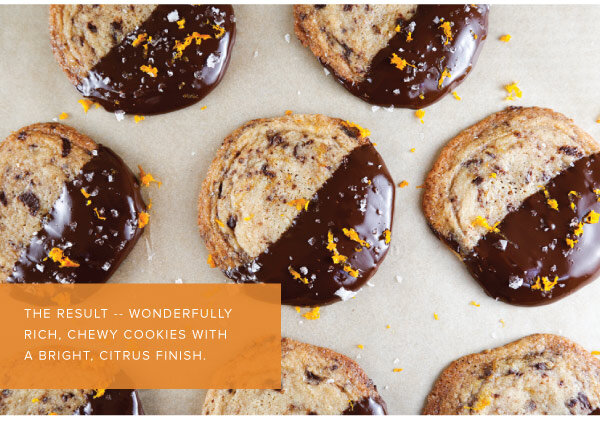
The flavors of chocolate and orange are a classic holiday duo for well-deserved reasons! In this recipe, rich dark chocolate is paired with light and bright citrus, resulting in a cookie that tastes so sophisticated, you’ll be happy you if you chose to make a double batch!

Chocolate Orange Cookies - Slice & Bake Makes about 24 cookies

Ingredients:
1 cup unsalted butter, softened
1/2 cup light brown sugar, packed
1-1/4 cups granulated sugar
1 large egg, room temperature
1 teaspoon pure almond extract
1 teaspoon freshly squeezed orange juice
2-1/4 cups all purpose flour
1/4 teaspoon salt
1/4 teaspoon cardamom
1 tablespoon orange zest (about 1 medium orange)
4 oz dark chocolate chunks, finely chopped, plus 16 oz dark chocolate chunks for melting
Coarse sugar for rolling, (such as sugar in the raw)
Flake sea salt
Additional orange zest for sprinkling

Directions:
1. In a stand mixer with a paddle attachment, beat the butter on medium speed until smooth. Add the sugars and beat on medium until light and fluffy. Add the egg and almond extract and beat on high speed until the ingredients are fully combined, roughly 5 minutes. Scrape down the sides and the bottom of the bowl with a spatula as needed. Add the orange juice and continue mixing for another minute. 

2. Sift the flour in a separate bowl and mix in the salt and cardamom. Slowly add the dry ingredients to the wet ingredients 1/2 cup at a time, mixing on low speed until fully incorporated. Fold in the orange zest and the 4 oz of finely chopped chocolate until evenly distributed. Gather and remove the dough from the mixer.

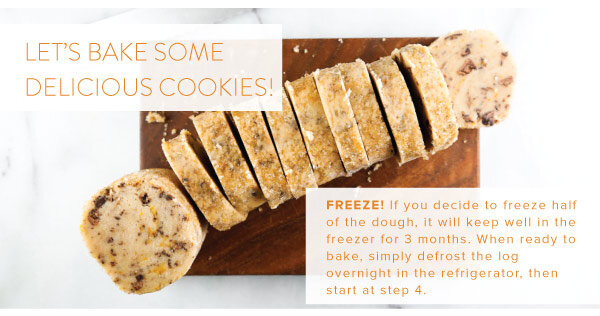
3. On a floured surface, divide the dough in half. Roll each half into a log, about 2-1/2 inches in diameter, and wrap in plastic wrap. Completely chill the dough (for at least 2 hrs, or for up to 1 week).

4. When ready to bake, preheat the oven to 350°F. Remove one of the dough logs from the refrigerator. Roll the logs in the coarse sugar and use a sharp, serrated knife to slice the log into individual rounds, roughly 1/2" thick. Place the cookies on a large cookie sheet, roughly 2" apart and bake for 12 minutes, or until the edges of cookies are just starting to brown. Cool on the cookie sheet for 2 minutes, then transfer to a cooling rack.

5. While the cookies are cooling, melt 16 oz of chocolate in a double boiler or in the microwave (careful not to burn the chocolate if microwaving!). Dip each cookie halfway into the chocolate to coat one half, and place the half-coated cookie on a parchment paper, or a silicone-lined baking sheet. While the chocolate is still warm, sprinkle the cookies with the flake salt and orange zest. Place the baking sheet in the refrigerator for about 30 minutes to allow the chocolate set.

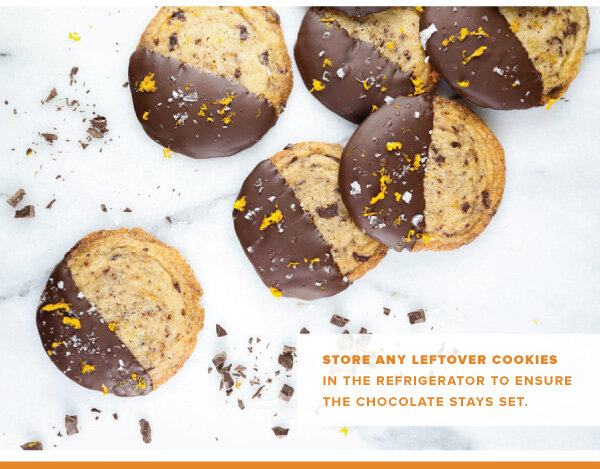
Store the cookies in the refrigerator to ensure the chocolate stays set.