Fresh Tomato Tart

 
Tomato_Tart_v6_01.jpg

Peak tomato season is upon us! A tomato tart is a unique and delicious way to showcase this summertime star. This dish features a Parmesan cheese crust layered with whipped ricotta and finished with slices of heirloom tomatoes and fresh basil. Enjoy this tomato tart with a simple side salad for a delightful lunch or dinner!


Fresh Tomato Tart
Makes one 9-inch square tart

Parmesan Crust Ingredients:
1-1/4 cups flour
1/2 teaspoon Kosher salt
1/4 teaspoon freshly ground pepper
1 cup Parmesan cheese, grated
1/2 cup cold, salted butter, cut into cubes
1-3 tablespoons ice water

Whipped Ricotta Filling Ingredients:
8 oz fresh ricotta cheese
1 tablespoon olive oil
1 teaspoon fresh lemon juice
1 teaspoon lemon zest
1/4 teaspoon Kosher salt

Topping Ingredients:
3 large heirloom tomatoes, sliced
Salt for tomatoes
Basil, chiffonade cut for garnish
Lemon zest, for garnish
Reduced balsamic vinegar, drizzled for garnish
Kosher or flake salt for garnish

Directions:

1. Prepare the crust. Using a food processor, pulse the flour, salt, pepper, and Parmesan cheese together until combined. Add 1/2 of the cubed butter and pulse until the texture is as coarse as cornmeal. Add the remain- ing butter and pulse a few times leaving some pieces the size of small peas. Slowly drizzle the water in one tablespoon at a time, and pulse until the dough forms. Avoid adding too much water.

2. Pat the dough into a disc form and wrap with plastic wrap. Refrigerate for at least one hour.

3. Meanwhile, prepare the whipped ricotta filling. In a food processor or high-powered blender, whip the ricotta with the olive oil, fresh lemon juice, lemon zest, and salt until a very smooth texture is formed.

4. Prepare the topping ingredients. Slice the tomatoes into 1/4”-thick slices, and place on a paper towel-lined sheet pan. Sprinkle the slices with Kosher salt and let them rest for a few minutes to release excess juices. Slice the basil into a chiffonade cut for a garnish. Zest a lemon to use as a garnish, as well.

5. Preheat the oven to 375°F. Roll out the crust on a flour-dusted work surface. Place the crust in a greased tart pan and trim the edges. Place pie weights inside the tart crust and bake for 15-20 minutes. Remove the pie weights and continue baking an additional 15-20 minutes or until the crust springs back when touched, and has turned a light golden hue. Allow the crust to cool completely on a cooling rack.

6. Assemble the tart once the crust has cooled completely. Spread the whipped ricotta on the baked crust. Top the ricotta layer with the tomato slices. Garnish with the basil, lemon zest, a pinch of salt, and a drizzle of reduced balsamic vinegar. Serve immediately. Enjoy with a simple side salad, if desired.


Grilled Flatbread

 
Grilled-Flatbread_V2_01a.jpg

Meat and veggies aren't the only thing to make on the grill -- try something new with our grilled flatbread! Puffy, with a delightful crackle on the exterior, grilled flatbread is different from a traditional pizza crust, but no less delicious. For this recipe, we’ve topped our flatbread with melty mozzarella, spicy garlic, and piled it high with fresh-from-the-garden salad.

Grilled Flatbread - with an Arugula, Tomato, & Basil Salad
Serves 2

Flatbread Ingredients:
1 cup lukewarm water
1 packet instant yeast
1 teaspoon honey
1 teaspoon Kosher salt
2-1/2 cups all-purpose flour, plus more for dusting and kneading
1 tablespoon olive oil, plus 1 tbsp olive oil for brushing crust
2 cloves garlic, thinly sliced
4-6 ounces fresh mozzarella cheese, thinly sliced

Salad Topping Ingredients:
4 cups arugula, washed
1/4 cup shaved Parmesan Reggiano
10 oz ripe cherry tomatoes, halved
1/2 small red onion, thinly sliced
6 leaves fresh basil, sliced chiffonade style

Salad Dressing Ingredients:
1 tablespoon freshly squeezed lemon juice
1/2 shallot, minced
3 tablespoons olive oil
1/2 tablespoon balsamic vinegar
1/4 teaspoon Kosher salt
1/4 teaspoon black pepper

Directions:
1. Prepare the dough. Add the yeast to warm water, and proof for 2 minutes (until a few bubbles begin to appear). Then add in the olive oil, honey, salt, and one cup of the flour. Mix together, and then slowly add in the remaining flour; mix until a rough dough ball is formed. Transfer the dough to a floured surface. With the heel of your hand, knead the dough, adding flour as necessary to keep it from sticking. Knead until the dough turns into a smooth ball; place in an oiled bowl. Cover the bowl with a towel and let rise at room temperature until doubled in size, about 1 hour.

2. Meanwhile, prep the salad ingredients. Wash the arugula, shave the Parmesan, halve the tomatoes, and finely slice the red onion. Chiffonade the basil by stacking individual basil leaves, rolling them all together, then thinly slice them into ribbons.

3. whisk together the salad dressing ingredients. Cover and refrigerate.

4. Once the dough has doubled in size, prepare a direct/indirect grill, with high heat on one side.

5. Divide the dough into 2 equal portions. On a floured surface, pat each piece into a circle, about 12" in diameter. Prepare 2 parchment-lined baking sheets. Brush the parchment with a little olive oil, then place the two crusts on the parchment. Brush the top of the crusts with a little more olive oil.

6.Once the grill is hot, work quickly to grill the dough. Use the parchment paper to lift the crust, turn it over onto the grill and remove the parchment from the top of the dough. Close the lid and grill the dough for 4-5 minutes until dough begins to flu and brown slightly. Then, carefully use long tongs or a large grill spatula, flip the dough and place over indirect heat.

7. Brush the grilled side of the crust with olive oil, sprinkle with the garlic and fresh mozzarella slices. Cover and grill for another 5-10 minutes, or until the cheese has melted. Watch closely and check often to make sure the flatbread doesn't burn. Remove the cheesy flatbread from the grill and get ready to top it with the salad.

8. In a large bowl, use tongs to toss the salad in the dressing until coated. Top the grilled flatbread with the salad, sprinkle with additional salt and pepper and enjoy immediately.


Scallops with Lemon Pasta

 
Scallops_v2_01.jpg

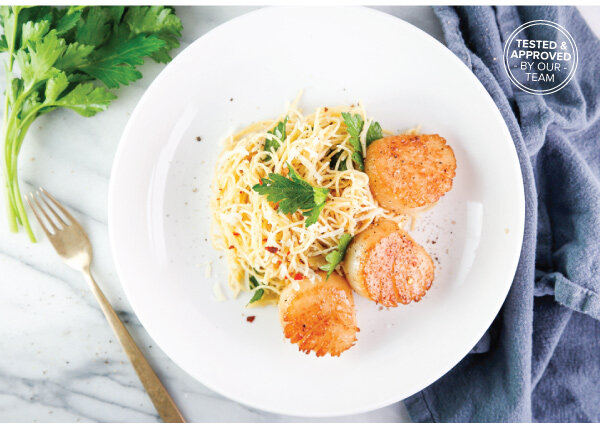
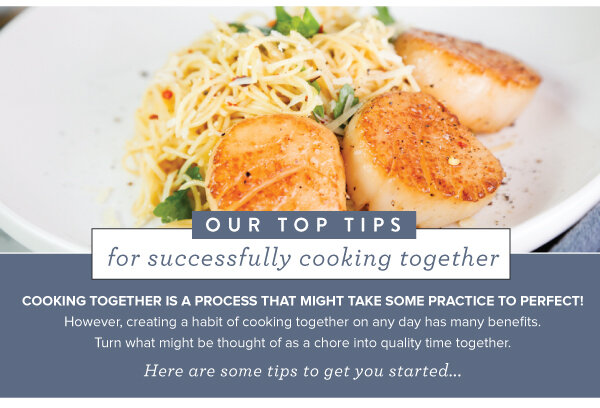
A classic romantic dinner for two, scallops and pasta make a great “date-night in”! Scallops are often referred to as the 'candy of the sea' — and for good reason! When cooked correctly, these beautiful morsels have the most delicate, sweet flavor. This issue showcases how to properly select and cook scallops — a presentation featuring a caramelized crust on the outside and a slightly-sweet, buttery-soft inside. Served on a bed of lemon-enhanced angel hair pasta, this meal is just as filling as it is fancy. 

Sugar-Seared Scallops with Lemon Pasta

Makes 2 generous servings

Sugar-Seared Scallop Ingredients:
10 sea scallops
1/4 teaspoon Kosher salt
1/4 teaspoon black pepper
2 tablespoons butter
2 tablespoons sugar
1 cup dry white wine

Lemon Pasta Ingredients:
1/2 lb angel hair pasta
5 tablespoons butter
5 cloves garlic, thinly sliced
1/2 teaspoon crushed red pepper flake
1-1/2 cup vegetable stock
1 tablespoon fresh lemon juice
1/2 tablespoon lemon zest
2 tablespoons fresh parsley, chopped
1/2 cup shredded parmesan
1/4 teaspoon salt
1/4 teaspoon pepper

Directions:
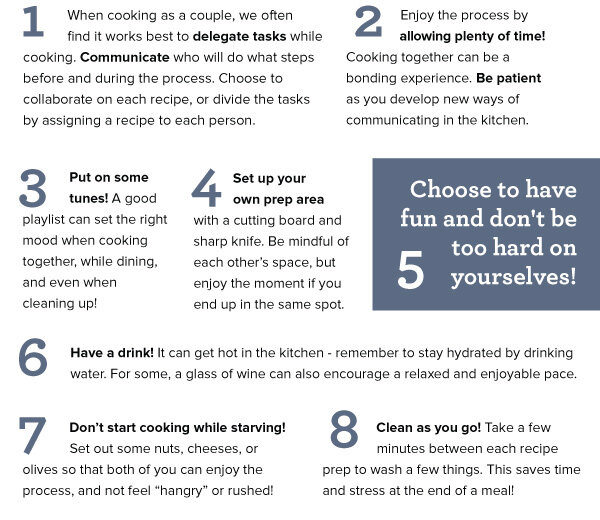
This is a great recipe to make with two chefs working together for a romantic meal! The first chef can focus on the pasta and sauce, while the second can sugar-sear the scallops. With both chefs working simultaneously, this dinner comes together quickly!

CHEF ONE PREPARE THE PASTA:
1. Prepare the pasta sauce by melting the butter over medium heat. Add the garlic and cook for 1 minute until fragrant. Add the crushed red pepper and cook for another minute. Add the vegetable stock, lemon juice, and lemon zest, and cook for 5 minutes to allow the flavors to get friendly.

2. Meanwhile, prepare the pasta by bringing a large pot of water to a rolling boil. Add a healthy dose of salt and add the pasta, cooking until al dente, about 2-3 minutes. Strain the pasta from the water and set aside until the scallops have seared.

CHEF TWO PREPARE THE SCALLOPS:
3. While Chef One makes the pasta, Chef Two can prepare the scallops. Gently rinse the scallops and pat dry with a paper towel. Gently remove the side muscle that secures the scallop to the shell, if necessary. Sprinkle the scallops with salt and pepper. Prepare a plate with a layer of sugar. 

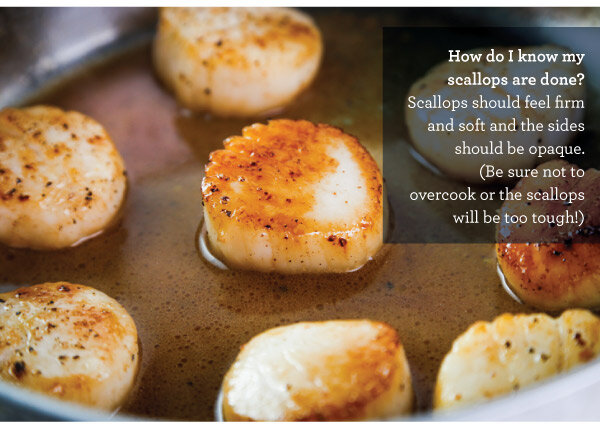
4. Sear the scallops. Heat the butter in a skillet on medium-high. While the butter heats, coat both sides of each scallop in sugar. Once the skillet is hot, work in two batches to cook the scallops. Place the scallops sugar-side down on the skillet, spacing them at least 1 inch apart, making sure not to crowd the pan. The scallops should sizzle on contact with the pan. If they start to brown too quickly, reduce the heat. Use tongs to gently flip and cook scallops for 2-3 more minutes. Scallops should release easily from the pan when they are ready to be turned. Remove the first batch of scallops from the pan and cook the second batch, reserving the pan juices. Deglaze the pan by adding the wine, and continue to cook the scallop juices and wine for another minute. Remove from the heat and set aside.

WORK TOGETHER TO PLATE THE DINNER: 
5. Just as the scallops finish searing, have Chef One stir the cooked pasta into the sauce. Use tongs to make sure the sauce fully coats the pasta. Sprinkle with parsley and parmesan and toss. 6. Artfully plate the pasta and have Chef Two add the seared scallops on top. Drizzle the seared scallops with any remaining scallop pan juices. Sprinkle with additional salt and pepper and serve immediately. Enjoy!