Grilled Nectarine and Chicken Salad

 
GrilledSalad_v3_01.jpg

Try this truly satisfying summer salad! Grilled chicken and nectarine halves perfectly complement the crispy crunch of fresh greens. Creamy goat cheese, bright blueberries, and a homemade, herbed buttermilk dressing seal the deal for this wonderful meal!


Grilled Nectarine and Chicken Salad with an Herbed Buttermilk Dressing
Serves 4

Salad Ingredients:
2 large chicken breasts, about 1 lb boneless, thinly sliced (or 4 thinly-cut chicken breasts)
4 nectarines, halved and grilled
6 oz spring mix of spinach and arugula
4 oz goat cheese, crumbled into bite-sized pieces
1 cup blueberries, washed
1/4 small red onion, thinly sliced

Chicken Marinade:
1 teaspoon Kosher salt
1/2 teaspoon black pepper
1/2 teaspoon garlic powder
1/2 teaspoon dried basil
1/2 teaspoon dried oregano
1/4 teaspoon paprika
2 tablespoons olive oil
2 tablespoons fresh lemon juice

Herbed Buttermilk Dressing:
1 clove garlic, grated
1 tablespoon fresh parsley, minced
1 tablespoon fresh basil, minced (8-10 leaves)
1 tablespoon chives, sliced
1/2 cup buttermilk
1/2 cup Greek yogurt
2 tablespoons olive oil
2 tablespoons lemon juice
1 tablespoon white wine vinegar
1 teaspoon Kosher salt
1/2 teaspoon black pepper
1/4 teaspoon garlic powder
1 teaspoon sugar

Directions:
1. Prepare the chicken breasts by thinly slicing in half to make thinner breasts for more flavor and faster grilling. Marinate the chicken in a large bowl. Rub the chicken on all sides with Kosher salt, pepper, garlic powder, basil, oregano, and paprika. Drizzle with olive oil and lemon juice. Cover and refrigerate the chicken; marinate for 30 minutes or up to 1 hour.

2. Prepare the herbed buttermilk dressing. Peel and grate the garlic using a fine grater. Wash the parsley, basil, and chives and chop finely. In a medium-sized glass bowl, whisk the buttermilk and Greek yogurt together until well combined. Add the olive oil, lemon juice, Kosher salt, pepper, garlic powder, and sugar; mix well. Whisk in the grated garlic and chopped herbs until evenly incorporated.

3. Prepare the nectarines for grilling by washing, and slicing in half. Carefully remove the pit with a paring knife. Brush each half with olive oil.

4. Fire up the grill! When using a gas grill, prepare half of the grill with high heat while keeping the other half on low heat -- that is, use a direct/indirect set-up. Add the chicken to the cooler side of the well-oiled grill and close the lid. After 4-5 minutes, turn once and cook an additional 4-5 minutes. Continue to grill and flip, as needed, until the thickest part of the breast reaches 160°F. After removing the chicken from the grill, the heat in the chicken breast will continue to rise until it hits the food-safe temperature of 165°F. Let the chicken rest for 5 minutes, then cut into slices.

5. Grill the nectarine halves flesh-side down over medium-high heat for 3 to 4 minutes or until grill marks appear.

6. Assemble the salad! Layer the greens and red onion with a drizzle of the herbed buttermilk dressing. Top the salad with the grilled chicken slices, grilled nectarine halves, goat cheese crumbles, and blueberries. Garnish with fresh chives, if desired.


Fresh Tomato Tart

 
Tomato_Tart_v6_01.jpg

Peak tomato season is upon us! A tomato tart is a unique and delicious way to showcase this summertime star. This dish features a Parmesan cheese crust layered with whipped ricotta and finished with slices of heirloom tomatoes and fresh basil. Enjoy this tomato tart with a simple side salad for a delightful lunch or dinner!


Fresh Tomato Tart
Makes one 9-inch square tart

Parmesan Crust Ingredients:
1-1/4 cups flour
1/2 teaspoon Kosher salt
1/4 teaspoon freshly ground pepper
1 cup Parmesan cheese, grated
1/2 cup cold, salted butter, cut into cubes
1-3 tablespoons ice water

Whipped Ricotta Filling Ingredients:
8 oz fresh ricotta cheese
1 tablespoon olive oil
1 teaspoon fresh lemon juice
1 teaspoon lemon zest
1/4 teaspoon Kosher salt

Topping Ingredients:
3 large heirloom tomatoes, sliced
Salt for tomatoes
Basil, chiffonade cut for garnish
Lemon zest, for garnish
Reduced balsamic vinegar, drizzled for garnish
Kosher or flake salt for garnish

Directions:

1. Prepare the crust. Using a food processor, pulse the flour, salt, pepper, and Parmesan cheese together until combined. Add 1/2 of the cubed butter and pulse until the texture is as coarse as cornmeal. Add the remain- ing butter and pulse a few times leaving some pieces the size of small peas. Slowly drizzle the water in one tablespoon at a time, and pulse until the dough forms. Avoid adding too much water.

2. Pat the dough into a disc form and wrap with plastic wrap. Refrigerate for at least one hour.

3. Meanwhile, prepare the whipped ricotta filling. In a food processor or high-powered blender, whip the ricotta with the olive oil, fresh lemon juice, lemon zest, and salt until a very smooth texture is formed.

4. Prepare the topping ingredients. Slice the tomatoes into 1/4”-thick slices, and place on a paper towel-lined sheet pan. Sprinkle the slices with Kosher salt and let them rest for a few minutes to release excess juices. Slice the basil into a chiffonade cut for a garnish. Zest a lemon to use as a garnish, as well.

5. Preheat the oven to 375°F. Roll out the crust on a flour-dusted work surface. Place the crust in a greased tart pan and trim the edges. Place pie weights inside the tart crust and bake for 15-20 minutes. Remove the pie weights and continue baking an additional 15-20 minutes or until the crust springs back when touched, and has turned a light golden hue. Allow the crust to cool completely on a cooling rack.

6. Assemble the tart once the crust has cooled completely. Spread the whipped ricotta on the baked crust. Top the ricotta layer with the tomato slices. Garnish with the basil, lemon zest, a pinch of salt, and a drizzle of reduced balsamic vinegar. Serve immediately. Enjoy with a simple side salad, if desired.


Spring Roll Bowls

 
Spring_Roll_Bowls_V2_01.jpg

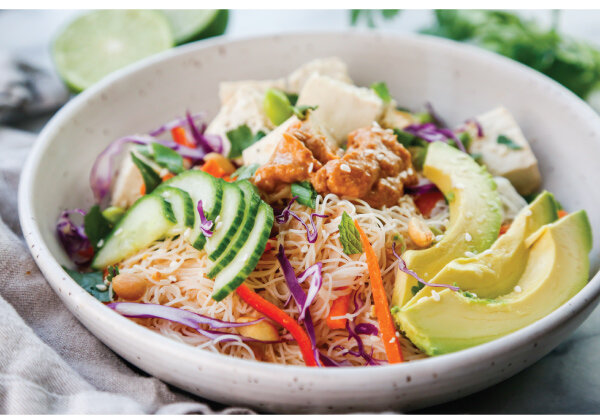
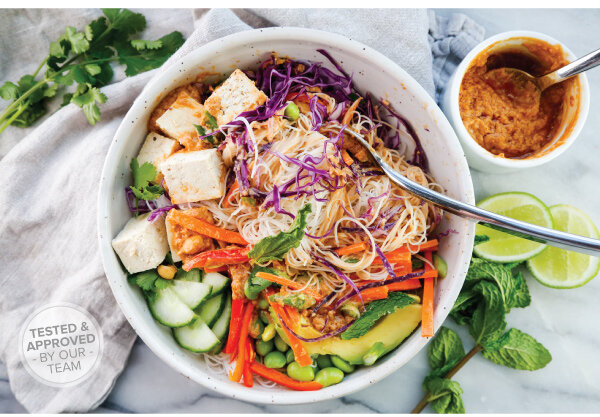
Craving fresh and flavorful? Crunchy, salty, sweet, colorful, and delicious -- our Spring Roll Bowls can satisfy them all! Great for lunch or dinner, this veggie-packed bowl delivers a healthy punch of flavor and goodness in an easy to assemble bowl. A rainbow of ingredients pair with marinated tofu and vermicelli noodles. It’s all topped with a bold and spicy peanut sauce that will tickle your taste buds!

Spring Roll Bowl with Spicy Peanut Sauce
Makes 4 servings

Tofu and Marinade Ingredients:
14 oz block firm or extra firm tofu
2 teaspoons soy sauce
1-1/2 tablespoons rice vinegar
2 teaspoons sesame oil
1/4 teaspoon black pepper
1/2 tablespoon sesame seeds

Bowl Filling Ingredients:
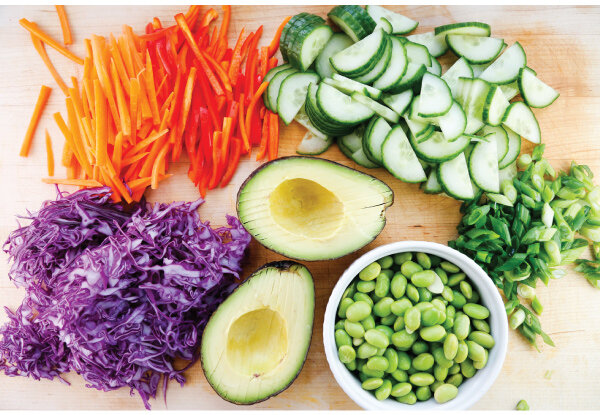
2 large carrots, or 4 small carrots peeled
1 red pepper
1 English cucumber
4 green onions, sliced
1 avocado, sliced
1/4 head red cabbage, sliced with a mandoline
1 cup edamame
8.8 oz vermicelli noodles (1 standard package)

Spicy Peanut Sauce Ingredients:
1 cup peanut butter
2 tablespoons chili garlic sauce
2 tablespoons soy sauce
2 tablespoons rice wine vinegar
2 teaspoons sesame oil
3 tablespoons fresh lime juice
2 cloves garlic, minced
2 teaspoons ginger, grated
1 tablespoon brown sugar
2 tablespoons water, for thinning

Garnishes:
1/4 cup mint leaves
1/2 cup unsalted peanuts
Fresh cilantro leaves
Lime wedges

Directions:
1. Prepare the tofu. Drain the tofu and cut it in half down the length of the tofu block. Press the tofu between two paper towel-lined plates and use a large book or a heavy cutting board to gently press out any excess moisture. Let the tofu continue to press while preparing the other ingredients.

2. Prep the veggies. Cut the carrots and red pepper into matchsticks. Slice the cucumber, green onion, and avocado. Use a mandoline to finely shred the cabbage. Measure out the edamame.

3. Make the peanut sauce. Combine all of the peanut sauce ingredients together, except for the water, in a small bowl or measuring glass, and whisk to incorporate. Slowly whisk in the water one teaspoon at a time to thin the sauce until it is just able to be poured.

4. Place the vermicelli noodles in a bowl with very hot water, stir to separate. Cover for 15 minutes until noodles are softened and tender. Drain the noodles and run them under cool water. Set aside.

5. Cut the pressed tofu into 1/2" cubes. In a medium bowl whisk all of the the tofu marinade ingredients together, except for the sesame seeds, and then combine with the tofu. Gently and slowly toss the tofu in the marinade until the tofu is coated. Set aside for 10 minutes to let flavors incorporate into the tofu. Then sprinkle the tofu with the sesame seeds.

6. Assemble the bowls. Divide the cooked vermicelli noodles equally into four bowls. Top the noodles with the bowl filling ingredients and the tofu, sectioning the ingredients if desired. Drizzle with the peanut sauce and garnish with mint, peanuts, cilantro, and lime wedges.


Classic Minestrone Soup

 
Minestrone_v2_01.jpg

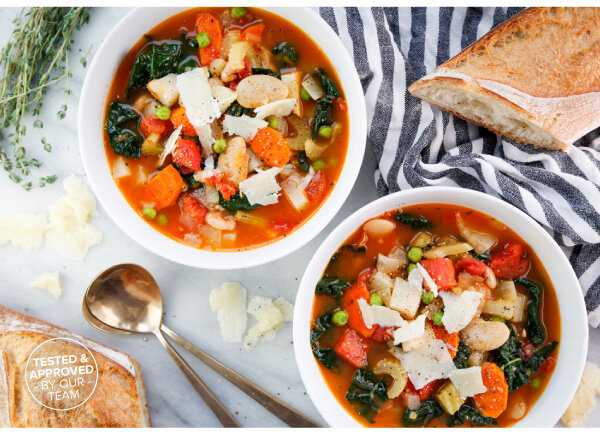
Minestrone, a classic Italian soup, features a wide range of  vegetables, beans, and pasta. Our recipe version focuses on techniques for building great flavor in stages. The result? Deep, rich, satisfying tastes and textures without being over-cooked. You’ll find this soup highly flexible – use seasonal vegetables, or whatever you have on hand.  We think you’ll agree that this minestrone easily earns its reputation as a healthy, winter comfort food.

Comforting Minestrone Soup
Serves 4 - 6

Ingredients:
4 tablespoons olive oil
1 yellow onion, diced
3 celery stalks, dice
2 carrots, cut on the bias into slices
2 small potatoes, cut into 1/2" cubes
3 cloves garlic, minced
1/2 tablespoon tomato paste
2 bay leaves
1 Parmesan cheese rind
1 can (28 oz) diced tomatoes
6 cups vegetable broth
1 can (15.5 oz) Great Northern beans
1 can (15.5 oz) butter beans
1 cup ditalini pasta (or other small pasta)
1/2 teaspoon Kosher salt
1/2 teaspoon pepper
2 sprigs fresh thyme
1/4 teaspoon red pepper flakes
1 tablespoon red wine vinegar
1 cup frozen peas
3 cups chopped kale
Parmesan cheese, shaved, for serving

Directions:
1. Start by making the mirepoix. Heat the olive oil in a large Dutch oven over medium-high heat. Add the onions and sauté for about 3 minutes until softened. Add the celery and carrots, and continue to cook for another 3-5 minutes, or until softened.

2. Add the potatoes and garlic and continue to cook for another 5 minutes. Stir in the tomato paste.

3. Add the bay leaves, Parmesan rind, canned tomatoes, vegetable broth, Great Northern and butter beans, ditalini pasta, salt, pepper, thyme, and red pepper flakes. Bring to a boil over medium-high heat.

4. Reduce the heat to medium-low and simmer the soup for another 20-25 minutes. Use tongs to remove the Parmesan rind, bay leaves, and thyme stems.

5. Stir in the red wine vinegar, frozen peas, and chopped kale. Cook for one more minute, or until the kale just begins to wilt. Serve with shaved Parmesan cheese as a garnish on top.


Manchego and Thyme Popovers

 
Popovers_v2_01.jpg

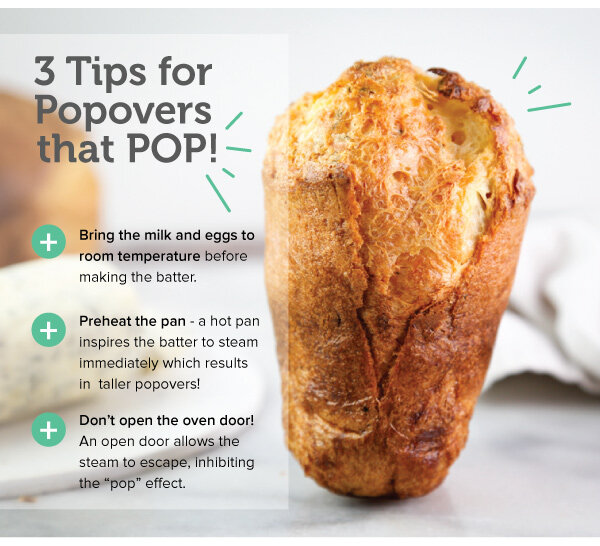
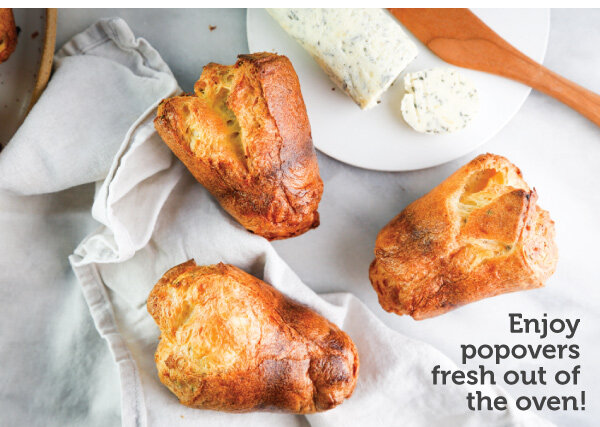
Popovers are impressive, high-rising rolls with a soft, airy inside and a crispy, crunchy exterior. These delectable morsels are meant to be enjoyed freshly baked straight out of the oven. IN THIS ISSUE, we feature Manchego and Thyme Popovers with an Herb Butter that would be enjoyably delicious as a savory breakfast, or as a side at lunch or dinner! 

Manchego and Thyme Popovers with Herb Butter
Makes 12 popovers

Popover Ingredients:
1-1/2 cups all purpose flour
1 teaspoon Kosher salt
1/2 teaspoon fresh ground black pepper
1 tablespoon fresh thyme, finely chopped
4 large eggs, room temperature
1-1/2 cups whole milk, room temperature
1/2 cup Manchego cheese, finely grated
2 tablespoons unsalted butter, melted (for greasing the popover pan)

Herb Butter Ingredients - makes 1/2 cup
1/2 cup (I stick) unsalted butter, softened to room temperature
1 garlic clove, minced
1 tablespoon fresh sage, finely chopped
1 tablespoon fresh rosemary, finely chopped
1/4 teaspoon Kosher saltPopover

Directions:
1. Preheat the oven to 450°F. Place the empty pan in the oven while it preheats. 

2. In a medium bowl, combine the flour, salt, and pepper and mix with a fork for about 30 seconds to incorporate evenly. Add the thyme and continue mixing until evenly distributed.

3. In a large bowl, whisk the eggs and whole milk together until contents are frothy, about 5 minutes.

4. Slowly add the flour mixture to the egg mixture and continue whisking until all the ingredients are combined and the batter is the consistency of thick cream. (Try not to over whisk!) Stir in the cheese.

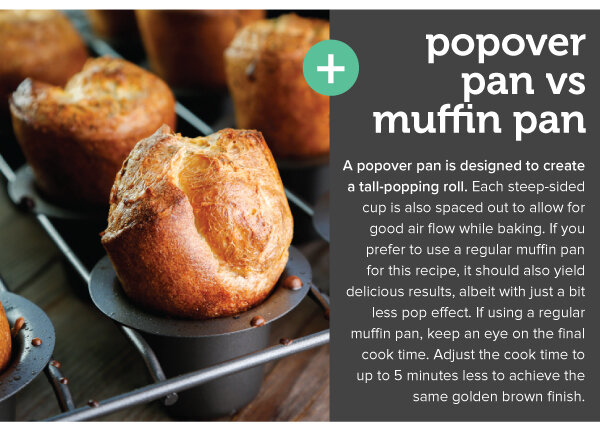
5. Remove the preheated popover or mun pan from the oven and brush the cups with the melted butter. Fill the cups 3/4 full with the batter. Bake the popovers on the lowest rack for 20 minutes. After 20 minutes, reduce the temperature to 350°F, ensuring the oven door stays closed so no steam escapes (this is crucial to getting the pop effect!). Continue to bake for another 20 minutes, or until golden brown.

6. Remove popovers from the oven and serve hot with herb butter. If not serving right away, remove popovers from the pan and cool on a wire rack immediately to keep that delightful crunch!

Herb Butter Directions:
1. In a small bowl, combine all of the ingredients together and mix with a fork or a hand mixer until the herbs and garlic are distributed evenly. 

2. Transfer the butter onto a sheet of plastic wrap and roll into a cylinder. Twist the ends of the plastic wrap tightly and refrigerate for at least one hour until cold and solid.

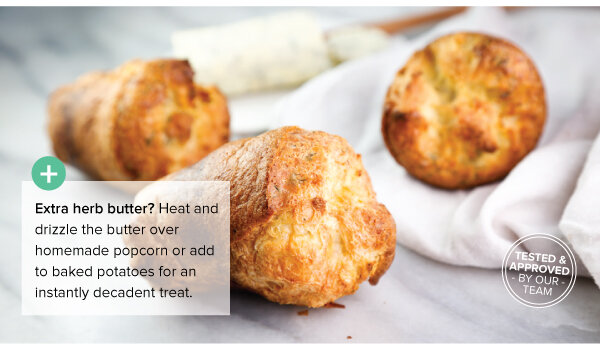
3. Serve herb butter alongside warm popovers in a small dish. Butter is best when enjoyed within 1 week, but can be frozen for up to two months. To freeze, simply wrap the plastic wrapped butter in parchment paper and freeze in a freezer bag, removing excess air. Extra herb butter? Heat and drizzle butter over homemade popcorn or add to baked potatoes.